Key Takeaways
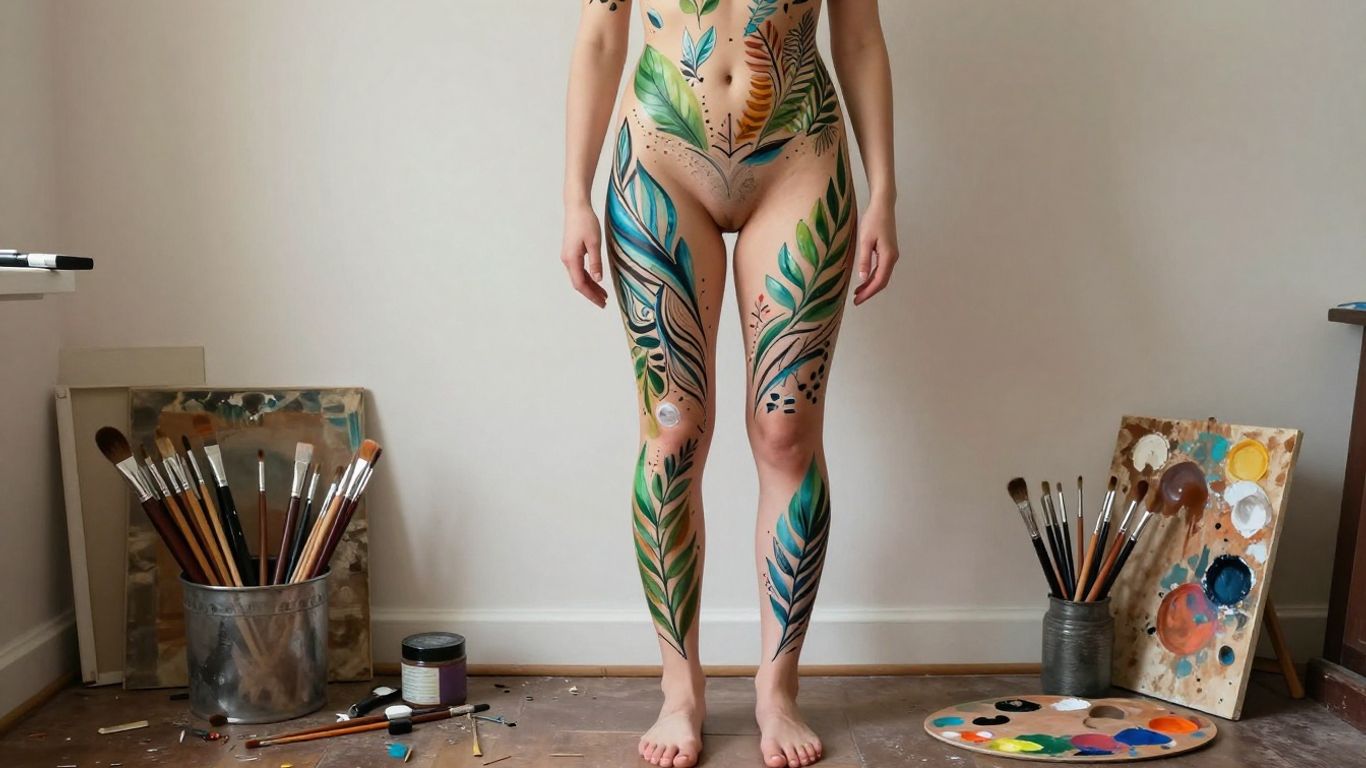
Painting on body is temporary art that asks you to work with movement, texture, and the natural shape of a person. Safe materials, thoughtful preparation, and a simple plan matter as much as artistic skill.
- Use only cosmetic-grade products intended for skin.
- Test unfamiliar paint on a small area before a full design.
- Plan patterns around anatomy, movement, clothing, and lighting.
- Build color gradually with suitable sponges, brushes, or airbrushes.
- Remove paint gently and stop if the skin becomes uncomfortable.
Understanding painting on body as an art form
Painting on body turns skin into a temporary surface for color, pattern, and illusion. Unlike a rigid canvas, the surface breathes, bends, warms, and changes shape as the model moves. That makes the process more responsive and collaborative than ordinary flat-surface painting. It also gives the finished work a fleeting quality: the design exists for a moment, then can be washed away.
How body painting differs from canvas painting
A canvas stays still and keeps its proportions, while a shoulder rises, a knee folds, and a rib cage expands with every breath. The painter has to understand how a design will look from several angles rather than from one fixed viewpoint. Light also behaves differently on curved skin, so a line that seems even while standing may appear stretched when the arm turns.
The model’s comfort becomes part of the technique. Breaks, changes of position, and clear communication help the artist maintain control without treating the body as an inanimate object. This is one reason body painting often feels closer to performance than to studio work.
Popular styles and creative approaches
Beginners can start with graphic motifs, botanical shapes, animals, geometric bands, or expressive brushwork. Some designs remain decorative, while others use color and contour to create the impression of clothing, scales, armor, or another surface. Cultural traditions also show how body painting can carry social, ceremonial, or personal meaning, so references should be approached with respect rather than copied casually.
For a broad look at the history and cultural context of the medium, this body-painting history is a useful starting point. The most successful beginner projects usually borrow a technique, not a sacred symbol or a community-specific design.
Choosing between full-body and partial designs
A partial design is usually easier to plan, paint, photograph, and remove. An arm, shoulder, calf, or upper back gives a beginner a manageable area while still allowing a strong visual statement. Full-body work can be compelling, but it demands more time, more product, and greater attention to continuity between separate areas.
Start with the area that best suits the purpose. A small painted panel may be ideal for a festival, while a larger connected design may suit a staged photograph. The scale should feel intentional rather than like an unfinished full-body concept.
How skin tone, texture, and movement affect the result
Color does not appear identically on every complexion, and the same pigment may need different layering to remain visible. Dryness, body hair, freckles, scars, and natural creases also influence how smoothly a design reads. Rather than trying to erase those features, treat them as part of the surface and adjust the pattern around them.
Movement offers another creative choice. A line following a muscle can make a pose feel longer, while a pattern crossing a joint may deliberately break and reconnect as the person moves. Artists studying realistic color relationships may also find this discussion of painting the human body helpful, even though it addresses figure painting rather than cosmetic body art.
Choosing safe body-painting supplies
The first supply decision is not about color; it is about suitability for human skin. Choose products labeled for cosmetic or theatrical use, check the directions, and pay attention to any warnings about eyes, lips, broken skin, or prolonged wear. Good preparation makes the creative process calmer and reduces the temptation to improvise with household materials.

Selecting cosmetic-grade paints
Look for water-based or otherwise clearly labeled body and face paints from a reputable source. Read the ingredient information when available, follow the product’s intended use, and avoid assuming that an art paint is safe simply because it is water-soluble. Glitter, metallic effects, and pigments near the eyes deserve extra caution because particles can migrate.
A small palette of dependable colors is better than a large collection of questionable ones. You can mix a surprising range from a few well-chosen hues, while keeping the kit easier to inspect and clean.
Brushes, sponges, airbrushes, and applicators
Sponges are useful for broad, even coverage, especially when the design needs a soft edge. Flat and round brushes handle different marks, from wide bands to narrow outlines, while a fine brush is valuable for facial features, small accents, and controlled contours. Airbrushes can create smooth transitions, but they require ventilation, careful masking, and equipment suited to cosmetic products.
Keep separate tools for broad color and detail where possible. Clean tools between colors and never share applicators in a way that could transfer skin oils, dirt, or infection-causing material.
Supplies to avoid on human skin
Do not substitute craft acrylics, industrial pigments, permanent markers, house paint, solvent-based products, or adhesive products not labeled for skin. Natural ingredients are not automatically harmless either; plant dyes and essential oils can cause reactions. Paint near mucous membranes, eyes, or the mouth should be treated with particular care.
Even products marketed for art can contain binders or pigments that are unsuitable for cosmetic contact. If the label does not clearly explain skin use, choose something else.
Performing a patch test before painting
Test a small amount of each unfamiliar product on an inconspicuous area, following the manufacturer’s directions and allowing enough time to observe the skin. A patch test cannot guarantee that a larger application will cause no reaction, but it can reveal obvious sensitivity before the event or photo session. Stop immediately if there is burning, swelling, itching, or unusual redness.
Keep the model’s medical history and known allergies in mind without asking for more personal information than necessary. A simple written product list can also help identify what was used if a reaction appears later.
Planning a body-painting design
A strong design begins before the first sponge touches skin. Consider the body as a three-dimensional form, then decide how the image should behave when the person stands, sits, turns, or walks. A rough plan saves time and makes the final painting feel deliberate rather than improvised.
Matching the design to the body’s shape
Trace or photograph the intended area in a neutral position and mark major landmarks such as joints, collarbones, the navel, or the edge of a shoulder blade. These landmarks can guide scale and prevent a central motif from drifting off balance. Curves can help a spiral or animal form feel integrated, while a rigid geometric design may need careful adjustment to avoid looking distorted.
Think of the body as a sequence of connected planes. A design that crosses from chest to arm should have a clear visual bridge, not simply stop where the torso ends.
Creating a sketch and color palette
Make a quick sketch from several angles, even if the finished design will be loose and painterly. Limit the first palette to a dominant color, one or two supporting hues, a dark for definition, and a light for highlights. This keeps the work cohesive and makes it easier to correct a muddy area.
A useful planning table might look like this:
| Design decision | Question to ask | Practical effect |
|---|---|---|
| Scale | Where will the main shape begin and end? | Prevents cramped or unbalanced placement |
| Contrast | Which areas must be visible from a distance? | Guides darks, lights, and accent colors |
| Direction | How should the eye travel across the body? | Creates flow through curves or repeated marks |
| Finish | Will the surface look matte, glossy, or textured? | Helps determine layering and setting choices |
Use the table as a prompt rather than a strict formula. A simple sketch with clear priorities is more useful than a detailed drawing that cannot accommodate the body’s movement.
Considering movement, clothing, and visibility
Ask what will rub against the painted area. Sleeves, waistbands, jewelry, chairs, and even a backpack strap can remove color or transfer it to fabric. Decide whether the design needs to read close up, from a stage, or through a camera lens, and leave enough space around joints for natural movement.
For ideas that suit a smaller area, this collection of arm and leg designs offers a useful reminder that body painting does not have to cover the entire figure. Visibility is a design constraint, not a limitation on creativity.
Adapting designs for events, photography, and performances
An event design needs to survive conversation, heat, and changing conditions. A photo design can use finer detail and stronger contrast because the camera will preserve small choices. A performance design usually needs larger shapes and clearer transitions so the audience can read it from a distance.
Plan a few test photographs before the final session. Camera exposure, colored lights, and shadows can make pale paint disappear or flatten careful shading, so a small trial often reveals more than a mirror does.
Preparing the skin before painting
Clean, dry skin gives paint a more predictable surface, but preparation should remain gentle. Strong scrubbing, heavy oils, and last-minute hair removal can leave the skin irritated before the artwork begins. Give the model enough time to settle, explain the process, and say where breaks will occur.

Cleaning and drying the skin
Wash the area with a mild cleanser and remove sweat, sunscreen, lotion, and loose debris. Rinse thoroughly, then pat the skin dry rather than rubbing it aggressively. Paint should be applied only after the surface is fully dry; trapped moisture can thin the product and make coverage uneven.
If the skin becomes damp during a long session, pause and blot gently with a clean disposable towel. Avoid repeatedly touching the area with bare hands.
Managing sensitive, oily, or dry skin
Sensitive skin benefits from a short product list and a slower patch-test process. Oily skin may cause slipping or beading, while very dry skin can make edges catch and flake. Do not cover these problems with layers of primer unless that primer is designed for cosmetic use and compatible with the paint.
The best adjustment is often modest: use less product, allow each layer to dry, and avoid painting over areas that feel hot or unusually tight. Comfort is a better guide than chasing perfect coverage.
Protecting hair, clothing, and surrounding surfaces
Use towels, disposable coverings, clips, and a washable work surface before opening the palette. Protect hair near the design with suitable barriers, and choose clothing that can be moved away without brushing the wet paint. Keep clean water, tissues, and waste containers within reach so the artist does not have to cross a room with loaded brushes.
For broader ideas about preparing a room and coordinating practical surfaces, this room planning guide offers principles that translate well to a temporary studio setup. The goal is simply to make cleanup and movement easier.
When not to paint over cuts, rashes, or irritation
Skip any area with an open cut, active rash, unexplained swelling, sunburn, infection, or significant irritation. Do not paint over fresh abrasions or recently treated skin just to complete a design. If the condition is uncertain, wait and seek appropriate medical advice rather than guessing.
The same caution applies when a model reports discomfort during the session. Removing one section or ending early is preferable to worsening a skin problem.
Applying body paint with professional techniques
Begin with the largest shapes and leave the smallest details until the end. Work in thin layers, step back often, and compare both sides of a design before adding more color. Thin, patient layers usually produce a cleaner result than trying to solve every area with one heavy application.
Building coverage with sponges
Dampen a sponge only as much as the product requires, then load it evenly and press or stipple rather than dragging it across the skin. Overlapping light passes create more even coverage and make it easier to preserve the skin’s natural texture. Use a fresh edge when changing colors or moving from one body area to another.
Let the first layer settle before deciding it needs more. Wet paint can look translucent or uneven until it dries, and rushing into a second layer may lift the one beneath it.
Creating detail with fine brushes
Use the tip of a clean, appropriately sized brush for lines and small shapes. Rest your painting hand lightly when possible, but do not press on freshly painted areas. For long curves, move from the arm or shoulder instead of relying only on the fingers; this produces a steadier gesture.
Practice the mark on a palette or practice sheet first. A line that is slightly too thick can often become part of the design, while repeated correction on skin can create a muddy patch.
Blending colors and adding shading
Blend adjacent colors while they are workable, but keep a clean brush and avoid overmixing. Shadows generally need to follow the body’s form rather than sit as arbitrary dark patches. A cooler or deeper version of the local color can suggest recession, while a lighter, carefully placed accent can bring a ridge or rounded area forward.
Make shading consistent with the lighting used for the final event or photograph. If the light changes direction, subtle painted modeling may become confusing.
Using stencils, patterns, and airbrushing
Stencils help repeat motifs and establish clean edges, but they should sit flat against the skin without excessive pressure. Test the stencil and paint combination on a practice surface before placing it on a curved body area. Airbrushing can provide soft transitions, although the artist must manage overspray, ventilation, eye protection, and the product’s cosmetic suitability.
Patterns work best when they support the body’s existing direction. Repetition does not have to be perfectly mechanical; small variations can keep the result lively.
Setting the finished design for longer wear
Follow the paint maker’s instructions for setting products, drying time, and removal. Use only a cosmetic setting spray or powder intended for the materials involved, and apply it carefully around the eyes, nose, and mouth. Even a well-set design will wear differently under heat, sweat, friction, and clothing.
Test the finished surface with a gentle touch before dressing the model. If color transfers heavily, allow more drying time rather than adding product at random.
Creating realistic and expressive body art
Realism depends less on adding endless detail than on understanding structure. The body already provides planes, curves, and landmarks that can make a painted illusion convincing. Expressive work can exaggerate those features, but it still benefits from observing how forms connect.
Using anatomy to improve proportions
Notice where a muscle widens, where a joint changes direction, and how the torso narrows toward the waist. Place important eyes, mouths, joints, or geometric centers with those landmarks in mind. A small shift can make a painted figure appear to lean, twist, or stretch.
Use a relaxed reference pose for the first sketch, then check the design in the pose the model will actually hold. The body may compress or extend considerably when seated or performing.
Painting shadows, highlights, and contours
Start by identifying the broad light and shadow pattern before placing bright highlights. A highlight on every ridge flattens the image, while a restrained highlight beside a deeper shadow can create convincing volume. Let the skin’s own tone contribute to the middle values instead of covering everything with opaque paint.
Photographing the work in progress can expose uneven transitions that are hard to see while standing close. A short pause for review often improves the result more than another layer of pigment.
Making designs appear to wrap around the body
A wrapping design should continue its rhythm across changing planes. Keep track of the main line as it passes over a shoulder, around a waist, or behind an arm, and avoid restarting the pattern without a visual reason. A motif may narrow, stretch, or disappear briefly at a fold, then reappear in alignment on the other side.
Walk around the model while checking the work. The design should offer a related experience from several viewpoints, not only from the position where it was first painted.
Adding texture, illusion, and three-dimensional effects
Texture can come from stippling, dry-brush marks, layered dots, broken lines, or controlled color variation. Illusions such as scales, metal, bark, or fabric become more believable when their texture follows the underlying anatomy. Use a few clear cues rather than covering the whole area with equal detail.
For home or studio presentation, ideas from this living room design guide can even help when choosing a neutral background, lighting position, and uncluttered setting for the finished work. The painted body should remain the visual focus.
Maintaining, photographing, and removing body paint
The final stage begins as soon as the last detail is finished. Give the paint time to dry, explain what may rub against it, and keep the model comfortable throughout the planned wear. Good documentation preserves temporary work, while gentle removal protects the skin that made the artwork possible.
Keeping the design comfortable during wear
Avoid tight clothing over fresh paint and take breaks if the model feels warm or restricted. Check areas beneath straps, folds, and accessories because friction can become uncomfortable before it visibly damages the design. The model should be able to report itching, burning, or tightness without feeling pressured to continue.
Comfort also improves photographs and performance. A relaxed pose usually looks more natural than one held rigidly to protect a fragile painted area.
Preventing smudging and color transfer
Keep freshly painted skin away from rough fabrics, wet surfaces, and repeated skin-to-skin contact. Carry tissues and a small amount of the original product for minor repairs, but do not repeatedly rub a damaged section. If the design will be worn outdoors, plan for heat, humidity, and sudden weather changes.
For project organization, even a simple departure-feedback process such as Premier Consultancy describes can inspire a useful habit here: note what worked and what failed after the session, without treating one project’s result as a universal guarantee. A short record makes the next design easier to manage.
Capturing the artwork in photos and video
Use soft, even lighting first so color and form remain readable. Take wide images for the complete composition, then closer views for texture and detail, and photograph several angles while the model holds comfortable poses. A neutral background and consistent camera distance help the artwork remain the subject.
Video can show how a design changes with movement, but it also reveals uneven coverage and accidental transfer. Record a short test clip before the main session so exposure, framing, and focus can be adjusted.
Removing paint without irritating the skin
Follow the paint manufacturer’s removal directions and begin with lukewarm water and a gentle cleanser when appropriate. Let water soften the product before wiping; forceful scrubbing can irritate skin even when the paint itself caused no problem. For stubborn areas, use only a remover labeled for the product and the relevant body area.
Pat dry afterward and use a plain moisturizer if the skin feels dry and the person normally tolerates it. Stop if the skin stings, becomes swollen, or develops persistent redness, and seek medical advice when a reaction does not settle.
Conclusion
Painting on body is most rewarding when art, safety, and collaboration are treated as one process. Start with skin-safe materials, plan for the body’s movement, build the image patiently, and document it with care. The temporary nature of the work is not a weakness; it gives each design its own brief, memorable life.
Frequently Asked Questions
Is body paint safe for everyone?
No product is universally safe for every person. Use cosmetics intended for skin, check the label, perform a patch test, and avoid painting over damaged or irritated skin.
Can I use acrylic paint for painting on body?
Acrylic craft paint is not automatically suitable for skin and should not be used unless the specific product is clearly labeled and approved for cosmetic body use. Choose a product made for human skin instead.
How long does body paint usually last?
Wear time varies with the product, skin, heat, sweat, friction, clothing, and preparation. A design may last through a short event but fade sooner in areas that bend or rub.
Should I moisturize before applying body paint?
Heavy lotion or oil can interfere with adhesion. Clean and dry the skin first, and use only a compatible cosmetic preparation if the product instructions call for one.
How can I make body paint look more realistic?
Study anatomy, use shadows and highlights sparingly, and let patterns follow the body’s curves. Checking the design from several angles is especially helpful.
What should I do if the paint starts itching?
Stop the session and remove the product gently according to its instructions. If irritation is severe, spreads, or continues after removal, seek medical advice.
What is the gentlest way to remove body paint?
Soften the paint with lukewarm water or the recommended remover, then wipe lightly rather than scrubbing. Pat the skin dry and avoid repeating the process aggressively.


Leave a Reply