Key Takeaways
Painting body paint is part cosmetic practice, part visual art, and good results depend on both preparation and restraint.
- Use only products labeled for cosmetic skin application.
- Match the formula to the event, weather, and finish you need.
- Prepare clean, lightly moisturized skin before painting.
- Build color gradually with suitable brushes, sponges, or airbrushes.
- Remove paint gently, then restore the skin’s moisture barrier.
Understanding painting body paint and its uses
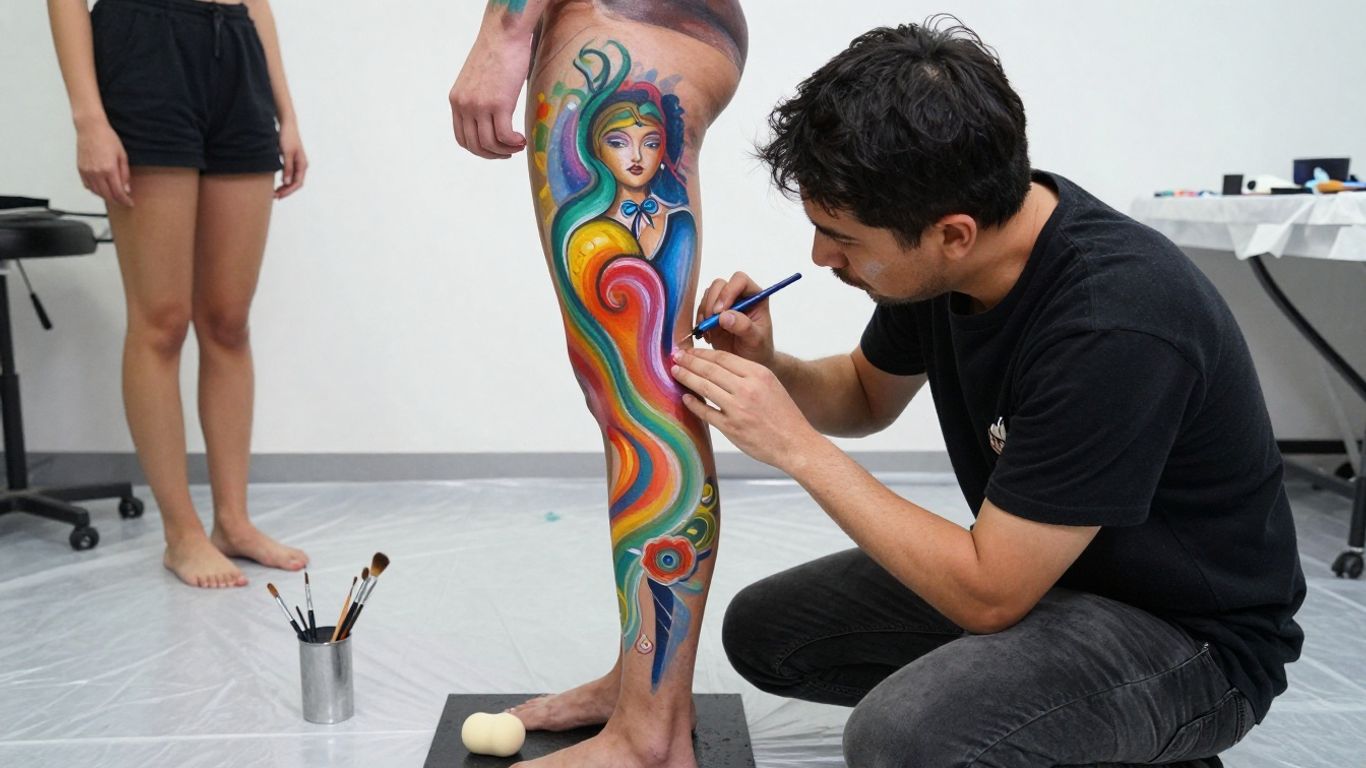
Painting body paint turns the body into a temporary canvas, whether the finished work is a small accent or a full-body composition. Unlike permanent body art, it can be changed, photographed, and washed away after an event. The best approach depends on where the paint will be worn, how long it must last, and how closely it will be viewed.
How body paint differs from face paint
Face paint is usually formulated for the smaller, more sensitive areas around the eyes, nose, and mouth. Body paint may be used across larger areas and often needs stronger coverage, but that does not mean every body product is suitable for the face. Always follow the label’s intended use, especially around mucous membranes and broken skin.
A design can also be called body painting even when it covers only an arm, shoulder, back, or leg. The distinction is less about size than about treating the body as part of the composition. Face paint tends to frame expressions, while body paint must also account for posture, curves, and movement.
Popular styles and creative applications
Body paint appears in festival looks, theatrical work, editorial photography, dance, costume design, and private creative projects. Some artists create graphic blocks of color, while others use fine lines to suggest scales, feathers, foliage, stone, or fabric. Cultural traditions also deserve careful research and respectful treatment rather than being borrowed as decoration without context.
For visual references, browse a face and body paint collection to compare the range of colors and finishes used for imaginative work. A reference is most useful when it helps you study structure, edge quality, and color relationships instead of encouraging an exact copy.
Choosing paint for photography, events, and performances
Photography often rewards saturated color and clean edges because lighting can flatten subtle changes. A live performance may call for quick application, comfortable wear, and a finish that remains readable from a distance. Outdoor events introduce additional concerns, including heat, sweat, wind, and the practical need for a straightforward removal process.
Discuss timing with the model or performer before beginning. Allow room for drying, touch-ups, costume changes, and breaks. For very long sessions, a simpler design with intentional negative space may look more polished than a dense design that becomes uncomfortable or difficult to maintain.
Water-based, alcohol-activated, and cream formulas
Water-based paints are generally activated with water and are approachable for brush and sponge work. Alcohol-activated products are commonly chosen when a more durable result is needed, but they require careful handling and should be used exactly as directed. Cream formulas can offer rich coverage and blending, though they may feel heavier or transfer more easily.
A useful comparison is to consider the formula alongside the setting rather than treating one type as universally best.
| Formula | Useful qualities | Common considerations |
|---|---|---|
| Water-based | Easy activation and flexible layering | May react to sweat or water |
| Alcohol-activated | Durable and quick-drying | Needs suitable remover and ventilation |
| Cream | Rich color and smooth blending | Can feel heavier or transfer |
That choice should guide your test application, tool selection, and expectations for touch-ups. A water-washable paint guide can also provide helpful background when you are comparing natural-ingredient and easy-clean options.
Choosing safe body paint products
Skin safety begins before the first brushstroke. Cosmetic labeling, clear directions, ingredient information, and a reputable source are more useful than a dramatic color name or a low price. Remember that “non-toxic” on a general craft product does not automatically mean it has been evaluated for use on human skin.

Ingredients to look for and avoid
Look for products clearly intended for cosmetic use and supplied with directions for skin application and removal. Be cautious with unlabeled mixtures, industrial pigments, solvent-heavy products, and anything that warns against skin contact. Fragrance, preservatives, and certain colorants can bother some people, so read the complete ingredient list when possible.
Do not apply paint over cuts, rashes, sunburn, active irritation, or freshly exfoliated skin. Avoid the eyes and lips unless the product specifically states that it is safe for those areas. If the label is unclear, choose another product rather than guessing.
Cosmetic-grade versus craft paint
Craft paint is made for objects such as paper, wood, canvas, or other surfaces, not for the changing conditions of human skin. It may crack, stain, trap moisture, or contain ingredients unsuitable for cosmetic contact. Cosmetic-grade body paint is designed with skin use in mind, but it still must be used according to its directions.
This distinction matters even for a short photo shoot. A product that looks smooth on a prop can behave very differently over joints, body hair, perspiration, and natural oils. For general surface-paint preparation, a car paint preparation guide is a different kind of resource and should not be treated as skin-painting advice.
Testing products for skin sensitivity
Patch testing cannot guarantee that a product will never cause a reaction, but it can reveal obvious problems before a long session. Apply a small amount to an inconspicuous area using the same activation method planned for the design. Leave it for the label’s recommended period, then check for burning, itching, swelling, redness, or unusual discomfort.
Test glitter adhesives, removers, and new cleansers separately when possible. If irritation appears, remove the product gently and stop using it. Seek medical advice for a severe or persistent reaction, particularly if swelling affects the eyes or breathing.
Selecting colors, finishes, and coverage
Choose colors in relation to the costume, background, lighting, and the natural undertones of the skin. Matte paint usually photographs with less glare, while metallic or pearlescent finishes can catch a light beautifully but reveal uneven texture. Strong opacity is helpful for graphic designs; transparent layers are better for washes, veils, and gradual transitions.
A small test swatch under the actual lighting can prevent surprises. It also lets you see whether a color dries darker, separates, transfers, or needs a second layer. A restrained palette often looks intentional, especially when the design already has complex anatomy and movement.
Preparing the skin before painting
Preparation affects both the finish and the wearer’s comfort. The goal is clean, calm skin with enough moisture to avoid a tight, flaky surface, but not so much oil that paint slips. Preparation should also protect the surrounding workspace, because body paint can travel farther than expected through brushes, hands, towels, and clothing.
Cleaning and moisturizing the skin
Wash the area with a gentle cleanser and lukewarm water, then pat it dry rather than rubbing. Heavy oils, body butter, and freshly applied sunscreen can interfere with adhesion, so allow the skin to settle before painting. If moisturizer is needed, use a light, well-tolerated product and give it time to absorb fully.
Do not aggressively scrub in an attempt to create a “blank” surface. Over-cleansing can leave the skin more reactive, which is the opposite of what a long painting session requires. Clean hands and short, smooth nails also help protect the model during close work.
Creating a smooth base for application
A smooth base comes from even skin preparation, not from covering every natural feature. Let each skincare product dry before adding paint, and consider a cosmetic primer only if it is compatible with the chosen formula. On areas with body hair, work with the direction of growth where possible and avoid piling on product to force coverage.
Test the base on a small area first. If paint beads, drags, or leaves gaps, adjust the amount of moisturizer, the activation water, or the tool pressure before beginning the full design. Small corrections at this stage save time later.
Protecting hair, clothing, and surrounding surfaces
Cover the work surface with washable sheets or disposable barriers, and keep clean towels nearby for accidental drips. Hair can be secured with clips, a cap, or a headband, while clothing should be protected with a robe or garment that allows access to the painted area. Ask before applying anything near hairlines, eyebrows, or facial hair.
A practical setup usually includes:
- A clean water container for activation and rinsing.
- Separate towels for the model and the work surface.
- A covered table for palettes, mirrors, and removable accessories.
- Gloves or handwashing access when switching between products.
These simple divisions reduce cross-contamination and keep the session calmer. They also make cleanup easier when the design requires frequent color changes.
Planning designs with references and templates
Sketch the design before it touches the body, noting which elements should remain visible when the model stands, sits, bends, or turns. Templates can help with repeated motifs, but they should be adapted to the body’s contours rather than pressed flat without adjustment. Marking broad placement points first gives the composition a stable structure.
For decorative arrangements, ideas from gallery wall planning can translate into useful visual thinking: balance focal points, vary scale, and leave breathing room. The body is not a flat wall, though, so every reference must be checked against movement and perspective.
Essential tools and application techniques
Good technique comes from matching the tool to the mark. A soft sponge can cover a large area quickly, while a firm brush creates edges and controlled details. Airbrush equipment can produce smooth transitions, but it adds setup, cleaning, ventilation, and overspray considerations.
Brushes, sponges, and airbrush equipment
Use broad, clean brushes for washes and coverage, smaller round or flat brushes for lines and shapes, and dense sponges for soft-edged color. Keep tools organized by color family or purpose so a dark pigment does not unexpectedly muddy a light one. Airbrushes require compatible paint, careful thinning or activation, and practice on a test surface before skin.
Disposable applicators can be useful when hygiene and quick changes matter. For artists who also work with tattoo equipment, a guide to tattoo cartridges discusses cartridge anatomy and stabilization, but those tools are not substitutes for cosmetic body-paint applicators.
Building color with thin, even layers
Start with a light layer and allow it to settle before deciding whether more coverage is needed. Pressing or stippling can build opacity without dragging the base underneath, while long strokes work well for broad, directional shapes. Thick paint tends to crack at joints and may take longer to dry.
Observe the surface as you work. If a second layer lifts the first, pause longer between passes or alter the amount of water and product. Gradual buildup gives you more control over both coverage and texture.
Creating lines, shading, and blended effects
Crisp lines usually come from a properly loaded brush, steady support from the other hand, and a deliberate stroke rather than repeated corrections. For shading, place the darker tone where a natural recess or design boundary would occur, then soften its edge while it is still workable. Blending is easier when adjacent colors overlap slightly instead of meeting as hard, unrelated bands.
Practice the pressure changes on a palette or practice sheet. A narrow brush held upright creates a different mark from the same brush held low and dragged sideways. Those small changes are especially visible in facial features, lettering-like motifs, and fine outlines.
Adding stencils, glitter, and decorative details
Stencils are helpful for repeated shapes, but they need firm contact with the skin and a controlled amount of product. Use cosmetic glitter and an adhesive intended for skin, keeping loose particles away from the eyes and avoiding materials that are sharp or craft-specific. Add small details only after the main paint is stable.

A final inspection from normal viewing distance is worthwhile. Details that look delicate up close can disappear under event lighting, while too much glitter can obscure the structure beneath it. Remove or soften anything that competes with the focal point.
Creating a professional body paint design
Professional-looking work is not simply highly detailed work. It has a readable composition, deliberate edges, and enough flexibility for the model to remain comfortable. Before painting, decide what the viewer should notice first and how the eye should travel across the body.
Mapping the composition onto the body
Begin with broad landmarks such as the shoulders, ribcage, spine, hips, knees, and elbows. Lightly place the main shapes, then compare them from the angles the audience or camera will actually see. This prevents a central motif from drifting or a repeated pattern from becoming uneven.
Keep a mirror, reference image, or camera preview available when appropriate. A quick photograph can reveal balance problems that are hard to notice while standing close to the model. Work from large shapes toward smaller accents so the design remains coherent if time runs short.
Working with anatomy, movement, and perspective
Muscles, joints, and changing posture can stretch or compress a painted image. Curves may make straight lines appear bent, while a motif spanning a joint can break when the model moves. Ask the model to rehearse key poses before you finalize delicate details.
Perspective also changes with the camera angle. A design intended for a three-quarter photograph may need stronger contrast on one side than a design meant for direct viewing. Plan for the final viewpoint, not only for how the work looks from the painter’s chair.
Coordinating colors and visual contrast
Limit the palette to colors that support the subject and setting. Contrast can come from hue, value, saturation, texture, or edge sharpness; it does not always require adding more colors. A quiet neutral area can make a vivid focal color feel stronger than another bright shade would.
When selecting background and costume, compare them beside a painted swatch under the intended light. This catches combinations that merge on camera. It also helps determine where highlights, shadows, and negative space need reinforcement.
Keeping the design comfortable during long sessions
Long sessions should include water, comfortable temperature, ventilation when required, and agreed-upon breaks. Avoid sealing large areas unnecessarily, and be especially careful around joints, tight clothing, and places where skin rubs together. The model should be able to report warmth, itching, stinging, or numbness without feeling pressured to continue.
Build the schedule around drying time and touch-ups rather than assuming the painting itself is the only task. A calm pace generally produces cleaner work and gives you a chance to correct small problems before they become visible in the final photographs.
Removing body paint and caring for the skin
Removal is part of the application plan, not an afterthought. The right method depends on the formula, the amount of product, and the sensitivity of the wearer’s skin. Work patiently, especially around hair, joints, and areas where repeated rubbing can cause irritation.
Loosening paint without excessive scrubbing
Begin by softening the paint with lukewarm water if the formula allows it, or with the remover specified on the label. Let the product sit briefly rather than attacking dry pigment with a rough cloth. Use gentle circular motions and replace saturated towels so you are lifting color instead of spreading it.
If a patch resists, pause and identify the formula before trying a stronger cleanser. Excessive scrubbing can leave redness even when the paint itself is harmless. Stubborn residue is usually better handled in several mild passes.
Using suitable cleansers and makeup removers
Choose a cleanser or makeup remover designed for the product and the body area being cleaned. Avoid household solvents, abrasive powders, and improvised chemicals. Take extra care near the eyes and lips, using only products labeled for those areas and keeping them out of the eyes themselves.
Rinse thoroughly when the directions call for rinsing, then pat the skin dry. If the wearer experiences burning, swelling, or persistent irritation, stop using the remover and seek appropriate medical guidance.
Moisturizing after removal
Once the skin is clean and dry, apply a simple moisturizer that the wearer already knows they tolerate. This helps relieve the dry, tight feeling that can follow repeated washing. Do not immediately layer on heavily fragranced products if the skin feels warm or reactive.
Give the skin a quiet period after removal. Avoid unnecessary exfoliation, hot water, and friction for the rest of the day if irritation is present. A gentle routine is usually more useful than trying to restore the skin quickly with several new products.
Cleaning and storing painting tools safely
Clean reusable tools as soon as the session ends so pigment does not dry inside fibers or equipment. Follow the paint and tool manufacturer’s cleaning directions, rinse thoroughly, and allow everything to dry fully before storage. Keep clean tools separate from used ones during the session.
Store brushes with their shapes protected and keep palettes, sponges, and airbrush parts in a dry, dust-free place. Replace cracked sponges, shedding brushes, or damaged equipment rather than letting them compromise the next application. For broader quality-control reading, GMP insights offer a useful reminder that consistent cleaning and documented routines matter, even though cosmetic body painting is not supplement manufacturing.
Conclusion
Painting body paint becomes more predictable when safety, skin preparation, composition, and removal are treated as one process. Choose a cosmetic product that suits the setting, build the design in manageable layers, and keep the wearer’s comfort central from the first patch test to the final rinse.
Frequently Asked Questions
Is body paint safe for everyone?
No product is safe for every person. Use cosmetics labeled for skin, patch-test new products, avoid damaged skin, and stop if burning, swelling, itching, or other concerning symptoms develop.
Can craft paint be used as body paint?
Craft paint should not be used on skin unless it is specifically labeled and intended for cosmetic application. Products made for objects may contain ingredients that are unsuitable for prolonged skin contact.
How long does body paint usually last?
Wear time varies with the formula, skin oils, heat, sweat, friction, and the amount of movement. Test the exact product and application method under conditions similar to the final event.
Should skin be moisturized before painting?
Clean, calm skin is ideal. A small amount of light moisturizer may help if the skin is dry, but it should absorb completely so the surface is not oily or slippery.
What is the best tool for applying body paint?
There is no single best tool. Sponges cover broad areas, brushes create lines and details, and airbrushes can create smooth transitions when the artist has suitable equipment and experience.
How should body paint be removed?
Follow the product’s removal directions, soften the paint before wiping, and avoid harsh scrubbing or household solvents. Rinse as directed and moisturize after the skin is clean.
Can glitter be used with body paint?
Use only glitter and adhesive labeled for cosmetic skin use. Keep particles away from the eyes, avoid sharp craft glitter, and remove decorative details gently at the end of the session.


Leave a Reply