
Preparing your walls before painting is an essential step to ensure a smooth and professional finish. Although it might seem like a big task, breaking it down into smaller steps makes it much more manageable. In this guide, we’ll walk you through each step, from gathering your tools to making the final preparations before you start painting.
Key Takeaways
- Gather all your tools and materials before starting the wall prep process.
- Clear the room of furniture and decorations and protect floors and fixtures.
- Thoroughly clean the walls to remove dust, dirt, and cobwebs.
- Repair any cracks or holes and sand the walls for a smooth surface.
- Apply primer evenly and allow it to dry completely before painting.
Gathering Your Tools and Materials
Before you start prepping your walls for paint, it’s crucial to gather all the necessary tools and materials. Having everything ready will save you time and make the process smoother. Here’s what you’ll need:
Essential Tools for Wall Prep
- Scrapers and putty knives
- Sanding blocks or sandpaper
- Drop cloths or plastic sheeting
- Painter’s tape
- Paint trays and liners
- Brushes and rollers
Choosing the Right Cleaning Solutions
For cleaning your walls, you’ll need:
- Mild detergent or soap
- Buckets and sponges
- TSP (trisodium phosphate) for tough stains
- Clean rags or cloths
Protective Gear and Safety
Safety should always come first. Make sure you have:
- Safety goggles
- Dust masks or respirators
- Gloves
- Protective clothing
By gathering these essential tools and materials, you’ll be well-prepared to tackle the wall preparation process efficiently and effectively.
Clearing and Protecting the Space
Before you start prepping your walls for paint, it’s important to clear and protect the space. This will help you avoid any damage and make the job easier. Here are the steps to get your space ready:
Removing Furniture and Decorations
Move all furniture, fixtures, and wall decorations out of the room. If you can’t move large pieces, cover them with drop cloths or plastic sheets to keep them safe from dust and paint splatters.
Covering Floors and Fixtures
Protect your floors by laying down drop cloths or plastic sheets. Make sure to cover any fixtures that can’t be removed, like light switches and outlets, to keep them clean.
Ventilation and Safety Precautions
Good ventilation is key. Open windows and doors to let fresh air in. This will help with drying times and keep you safe from fumes. Also, make sure to wear protective gear like masks and gloves to stay safe while you work.
Cleaning the Walls
Before you can achieve a smooth and flawless paint finish, it’s essential to thoroughly clean the walls. Cleaning removes dirt, dust, grease, and other contaminants that can affect paint adhesion and the overall quality of the final result. Follow these steps to effectively clean your walls:
Repairing Wall Imperfections
Once your walls are clean, it’s time to fix any cracks, holes, or other flaws. This step is key to getting a smooth surface for painting. Follow these steps to repair your walls:
Filling Cracks and Holes
Start by looking over your walls for any damage. If you see any cracks or holes, you’ll need to fill them. Use a filler or spackling compound and a putty knife to push the filler into the gaps. Make sure it’s level with the wall. Let it dry completely before moving on.
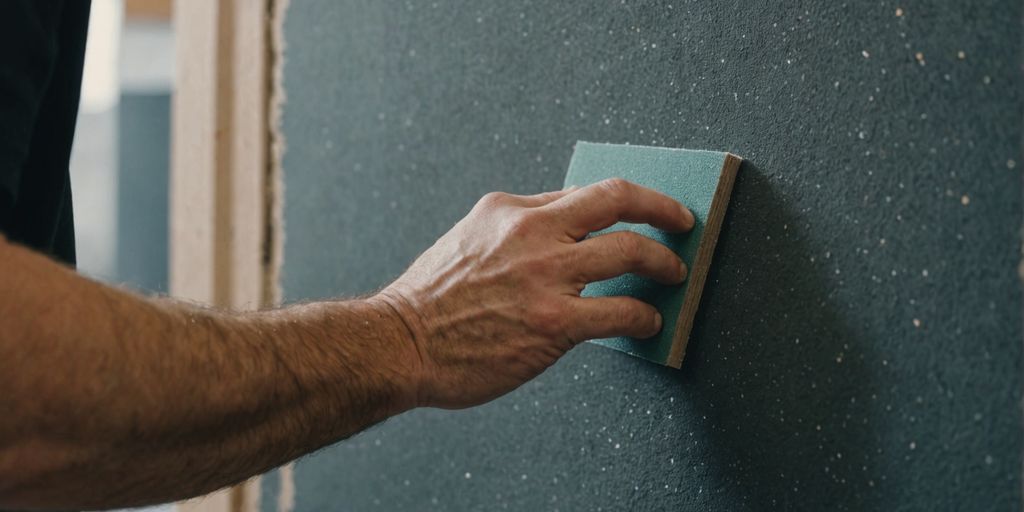
Sanding for a Smooth Surface
After the filler is dry, sand the area to make it smooth. Be careful not to sand too much and damage the wall. Wipe away any dust with a clean cloth. Check the area again for any rough spots. If needed, add another thin layer of filler and sand it again.
Checking for Mold and Mildew
Look for any signs of mold or mildew on your walls. If you find any, clean it with a mold remover. Make sure the area is completely dry before you start painting. This will help keep your walls looking good and your paint lasting longer.
Taping and Masking Edges
Choosing the Right Tape
Selecting the right tape is crucial for a clean paint job. Painter’s tape is designed to prevent paint from bleeding through and is easy to remove without damaging surfaces. Make sure to choose a tape that suits the surface you’re working on, whether it’s wood, metal, or drywall.
Applying Tape to Trim and Edges
To get sharp paint lines, carefully apply the tape along the trim and edges. Measure and cut the tape to fit each section. Press down firmly to ensure it sticks well and creates a tight seal. For corners or curves, gently fold the tape to keep a neat edge. Overlap the ends of adjacent tape sections by about half an inch to avoid gaps.
Protecting Outlets and Switches
Before you start painting, remove outlet and switch covers or cover them with tape. This prevents paint from splashing on them. Taking these steps will save you from tedious touch-ups later and help you achieve a professional-looking finish.
Properly taping and masking edges ensures clean and well-defined paint lines, making your paint job look professional and saving you time in the long run.
Priming the Walls
Priming the walls is a crucial step in the wall preparation process that provides several benefits for your paint job. Primers create a uniform surface, enhance paint adhesion, improve color accuracy, and promote a long-lasting and professional finish.
Final Preparations Before Painting
Before you start painting, it’s important to make sure your walls are ready. This final step will help you get a smooth and professional finish.
Conclusion
Prepping your walls for painting might seem like a lot of work, but breaking it down into smaller steps makes it much easier. From cleaning and repairing to taping and priming, each step is important to get a smooth and long-lasting finish. Remember, the better you prepare, the better your paint job will look. So take your time, follow the steps, and soon you’ll have walls that look professionally painted. Happy painting!
Frequently Asked Questions
What tools do I need to prep walls for painting?
You’ll need basic tools like soap, a sponge, gloves, a bucket, a stripping knife, filler, a filling knife, protective sheets, and sandpaper.
How do I clean walls before painting?
Clean the walls with a sponge and warm water. For greasy or oily areas, use a mixture of water and a grease-cutting detergent. Finish by wiping the walls with a damp cloth.
Do I need to move all furniture out of the room?
Yes, it’s best to remove all furniture and decorations to keep them safe and to give you enough space to work.
How do I deal with cracks and holes in the wall?
Fill any cracks and holes with filler, then sand them down to create a smooth surface.
Is it necessary to prime the walls before painting?
Yes, applying a primer helps the paint adhere better and ensures a more even finish.
What should I do if I find mold or mildew on the walls?
Clean the affected area with a mixture of water and bleach. Make sure the wall is completely dry before painting.


Leave a reply to Top Interior Design Trends of 2024 – PERFECT PAINTER Cancel reply