

Painting concrete can really change the look of a space, whether it’s your garage floor, a basement wall, or an outdoor patio. But picking the right paint for painting concrete isn’t always straightforward. You’ve got different types of paint, and each works best on certain surfaces and handles different kinds of wear and tear. Plus, getting the surface ready is a big part of the job. Let’s break down how to choose and apply the best paint for painting concrete so your project turns out great.
Key Takeaways
- Acrylic latex paint is good for general use and easy application on concrete, but epoxy paint offers greater durability for high-traffic spots like garage floors.
- Proper preparation, including cleaning, repairing cracks, and etching, is vital for paint adhesion and a long-lasting finish on concrete.
- Always use a concrete primer before applying paint to seal the surface and improve how well the paint sticks.
- When painting concrete, apply thin, even coats using rollers and brushes, allowing proper drying time between each layer.
- Consider factors like durability, slip resistance, and color to select the best paint for painting concrete surfaces based on their intended use and your aesthetic preferences.
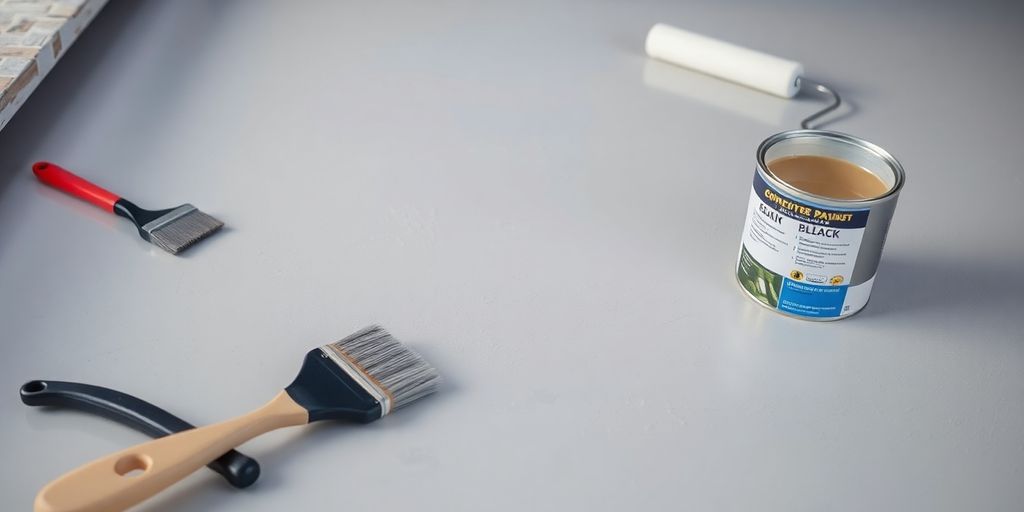
Understanding Concrete Paint Options
When you’re looking to spruce up concrete surfaces, whether it’s a garage floor, a basement wall, or an outdoor patio, picking the right paint is key. It’s not just about the color; the type of paint you choose will make a big difference in how it looks, how long it lasts, and how easy it is to apply. Let’s break down the main players in the concrete paint world.
Acrylic Latex Concrete Paint
This is probably the most common type of paint you’ll find for concrete projects. It’s water-based, which makes it pretty easy to work with, just like regular house paint. You don’t need any special tools – your standard brushes and rollers will do the trick. It’s a good option if you’re on a budget and want a straightforward DIY job. However, it’s not the toughest kid on the block. While it can hold up okay on walls, if you’re painting a floor that gets a lot of foot traffic or is in a garage, you might find yourself needing to repaint it every couple of years. Some acrylic paints come with added grit to make them less slippery, which is a nice touch for floors.
Epoxy Concrete Paint
Epoxy paints are often the go-to for professionals, and for good reason. They’re a two-part system, usually a resin and a hardener that you mix together before applying. This might sound a little intimidating if you’re new to painting, but the result is worth it. Epoxy creates a really tough, durable finish that can handle a lot of wear and tear. It’s fantastic for garage floors because it’s resistant to water, stains, and chemicals. You can even get them with decorative flakes for a really cool, high-end look. The downside is they usually cost more than acrylics and can be a bit trickier to apply, especially on porous concrete.
Oil-Based Concrete Paint
Oil-based paints offer a hard, shiny finish and are generally more durable than their latex counterparts. They tend to be a bit more resistant to wear and tear. The trade-off? Cleanup is a bit more involved since you can’t just use water – you’ll need mineral spirits or a similar solvent. They can also be a bit trickier to apply smoothly, and the fumes can be stronger, so good ventilation is a must. While they offer good durability, they’re less common for DIY concrete projects compared to acrylics and epoxies these days.
Choosing the right paint means thinking about where it’s going and how it will be used. A garage floor needs something tougher than a basement wall, and a patio needs to handle weather. Don’t just grab the first can you see; consider the durability, finish, and ease of application for your specific project.
Choosing Paint for Specific Concrete Surfaces
So, you’ve got concrete surfaces that need a facelift. That’s great! But not all concrete is created equal, and neither is the paint you’ll use on it. Picking the right stuff makes a huge difference in how long it lasts and how good it looks. Let’s break down what works best for different areas.
Best Paint for Concrete Patios and Porches
When you’re painting a patio or porch, you’re usually dealing with something that gets a lot of foot traffic and weather. You want a paint that can handle being walked on, maybe even a bit of rain or sun. Acrylic latex paints designed for porches and patios are a solid choice here. They’re usually water-based, which makes them easier to clean up, and many come with a bit of grit mixed in to help prevent slips. That’s a big plus for outdoor areas where things can get slick when wet. You’ll want to look for paints that specifically mention ‘porch and patio’ on the label. They’re formulated to resist fading and cracking from temperature changes.
- Durability: Needs to withstand foot traffic and weather.
- Slip Resistance: Crucial for safety, especially when wet.
- UV Resistance: Helps prevent fading from sun exposure.
Remember, even the best paint won’t stick if the concrete isn’t prepped right. Cleaning and making sure it’s totally dry before you start is super important.
Ideal Paint for Concrete Garage Floors
Garage floors are a whole different ballgame. They have to deal with car tires, oil drips, and all sorts of heavy stuff being moved around. For this, you really need something tough. Epoxy concrete paint is often the go-to here. It creates a really hard, durable finish that’s resistant to chemicals and abrasion. While it might cost a bit more upfront, it generally lasts much longer than standard latex paints on garage floors. You can get two-part epoxy kits, which you mix just before applying, or single-part options. The two-part systems are usually tougher.
- Chemical Resistance: Must stand up to oil, gas, and other automotive fluids.
- Abrasion Resistance: Needs to handle tires and heavy objects.
- Adhesion: Strong bonding is key to prevent peeling under stress.
Paint for Concrete Walls and Basements
Painting concrete walls, like those in a basement or a garage interior, is often less about heavy traffic and more about aesthetics and moisture resistance. Acrylic latex paints work well here, offering a good range of colors and a more breathable finish compared to some other options. If you’re painting basement walls, you might also be looking to cover up imperfections or give the space a cleaner, brighter feel. Some masonry paints are also suitable for concrete walls and can offer good protection.
- Breathability: Allows moisture vapor to pass through, reducing the risk of blistering.
- Mold/Mildew Resistance: Important for damp basement environments.
- Coverage: Good hiding power for imperfections is often desired.
When choosing paint for any concrete surface, always check the manufacturer’s recommendations. They’ll tell you if the paint is suitable for your specific project and what kind of preparation is needed. Getting the right paint for the job is half the battle, and it makes the whole painting process much smoother. For exterior house painting tips, you might find helpful advice useful.
Key Factors When Selecting Concrete Paint
Picking the right paint for your concrete project isn’t just about picking a color you like. You’ve got to think about how the surface will be used and how long you want the paint job to last. It’s a bit more involved than just slapping some color on a wall.
Durability and Longevity
This is a big one, especially for floors that get a lot of foot traffic or even cars. Acrylic latex paints are generally easier to work with and clean up, but they might only last a couple of years on a floor before needing a refresh. Epoxy paints, on the other hand, are tougher. They usually involve mixing two parts, which sounds a bit tricky, but they hold up much better over time. If you’re painting a garage floor or a busy patio, you’ll probably want to lean towards something more durable like epoxy.
Slip Resistance and Finish
Think about how slippery the surface will be, especially if it’s a walkway or a patio. Glossy finishes can look nice and are usually easy to clean, but they can also be slick when wet. Many paints designed for concrete floors have added grit to make them slip-resistant. If you’re going for a shiny look, make sure it has anti-slip properties, or consider a matte finish for better traction.
Color and Aesthetic Appeal
While many concrete paints come in standard grays and whites, some options offer a wider range of colors. Epoxy paints, in particular, can sometimes come with color flakes you can add for a more decorative look. Consider how the color will affect the feel of the space – a bright color can liven up a basement, while a more neutral tone might be better for a high-traffic area.
When choosing your paint, always check the manufacturer’s recommendations for the specific type of concrete surface you’re painting. What works for a patio might not be the best choice for a garage floor or a basement wall.
Essential Steps for Preparing Concrete Surfaces
Alright, so you’ve picked out your paint, maybe even your fancy new color. But before you even think about cracking open that can, we gotta talk about getting the concrete ready. Skipping this part is like trying to bake a cake without preheating the oven – it just won’t turn out right, and you’ll probably end up with a sticky mess. Proper prep is the real secret sauce to a paint job that actually lasts.
Cleaning and Degreasing Concrete
First things first, that concrete surface needs to be spotless. Think of it like giving your concrete a good bath. You want to get rid of all the dirt, dust, grime, and especially any grease or oil. If you’re dealing with a garage floor or a patio that’s seen some spills, you’ll want to use a heavy-duty cleaner or a degreaser. A stiff brush or a push broom works wonders here. Scrub it down well, then rinse it off thoroughly. Make sure you get all the cleaning solution residue off, too. You might need to do this a couple of times if the concrete is really grimy. After rinsing, try to get as much water off as possible, maybe with a squeegee, and then just let it air dry completely. Opening windows or using fans can speed this up.
Repairing Cracks and Imperfections
Once it’s clean and dry, take a good look for any cracks, holes, or chipped bits. These little imperfections can mess with how the paint lays down and can even let moisture get under the paint later on. You’ll want to grab a concrete patching compound or filler for this. Follow the instructions on the product – usually, you just mix it up and spread it into the cracks or holes. Try to get it as smooth and level with the rest of the surface as you can. You might need a putty knife or a trowel for this. Let those patches dry completely according to the product’s directions. Sometimes, especially for deeper cracks, you might need a second coat of filler.
Etching and Moisture Testing
Now, for the surface texture. Paint likes something to grip onto, and smooth, slick concrete isn’t ideal. This is where etching comes in. You can buy a concrete etching solution, often a mild acid, or use a TSP (trisodium phosphate) cleaner. You’ll apply this stuff, let it sit for a bit, and then scrub and rinse it really well. The goal is to create a slightly rough surface, kind of like fine-grit sandpaper. After etching and rinsing, you absolutely have to let the concrete dry out. Like, really dry. A good way to check is the plastic sheet test: tape down a square of plastic wrap or foil tightly to the concrete. Leave it for 24 hours. If you see any condensation or moisture under the plastic when you peel it up, your concrete is still too wet. You’ll need to wait longer or figure out why there’s moisture there in the first place. Painting over damp concrete is a recipe for peeling paint down the road.
Remember, taking your time with these preparation steps is way more important than the actual painting. A little effort now saves a lot of headaches later.
Applying Primer for Optimal Adhesion
Why Use a Concrete Primer
Think of primer as the unsung hero of your concrete painting project. It’s not just an extra step; it’s what makes the difference between a paint job that looks good for a while and one that holds up over time. A good primer seals the concrete, preventing the porous surface from soaking up too much of your topcoat paint, which saves you paint and gives you a more even color. It also creates a surface that the paint can really grip onto, meaning less peeling and chipping down the road. Without it, you’re basically painting on a surface that’s trying its best to reject the paint.
Application Techniques for Primer
Getting primer on correctly is pretty straightforward, but there are a few things to keep in mind. You’ll want to use a brush for the edges and corners – get right into those tight spots. For the main areas, a roller works best. Just like with painting, try not to paint yourself into a corner where you can’t get out easily with the roller. If you’re working on a larger area like a garage floor or a patio, a roller with a thicker nap is usually a good choice. Some people recommend two coats of primer, especially if the concrete is really old or has a lot of variation in its porosity. It might seem like more work, but it really pays off in the final finish.
Drying Times for Primer Coats
This is where patience really comes into play. You can’t just slap on the next coat of primer or the paint right away. You need to let that primer dry completely. Most concrete primers will tell you on the can to wait at least a couple of hours between coats, and definitely before you put on your first coat of paint. It’s a good idea to check the specific product you’re using, as drying times can change based on temperature and humidity. If it feels even a little bit tacky, it’s probably not ready. Rushing this step is a surefire way to mess up the adhesion you worked so hard to create with the primer in the first place.
Techniques for Painting Concrete Surfaces
Alright, so you’ve prepped your concrete like a pro, primed it, and now it’s time for the main event: painting. This is where all that hard work really pays off, but you still gotta do it right. It’s not just about slapping paint on; there are a few tricks to make sure it looks good and lasts.
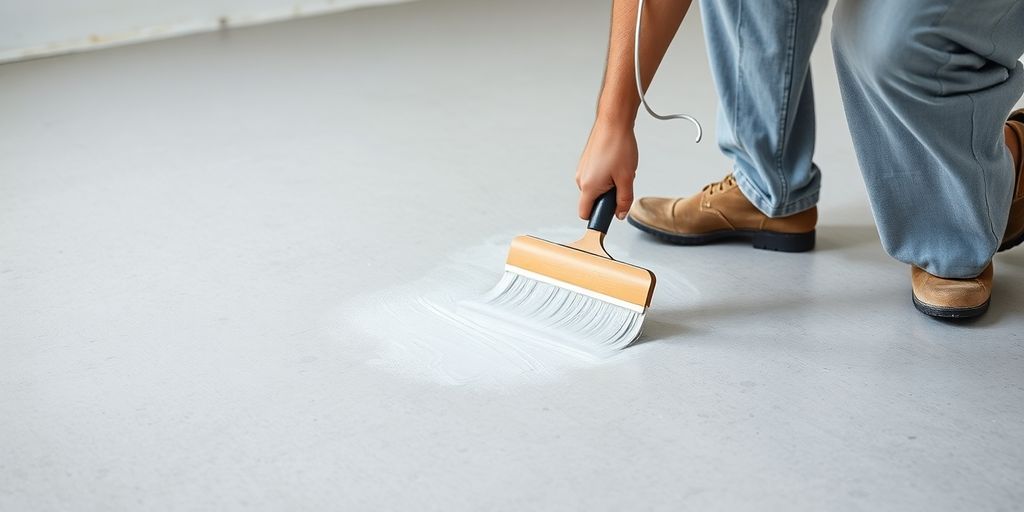
Applying the First Coat of Paint
When you start with the first coat, think about how you’re going to move. You don’t want to paint yourself into a corner, literally. It’s usually best to start at one end of the surface and work your way across. For the edges and any tight spots near walls or fixtures, grab a good quality brush. This gives you clean lines. Then, for the larger areas, a roller with a decent nap is your best friend. It helps spread the paint out evenly. Just keep a steady hand and try to cover the area without leaving thick drips.
Achieving an Even Finish
Getting an even finish is all about consistency. Make sure you stir your paint really well before you start, and give it a stir every so often as you go. This keeps the color uniform. When you’re rolling, overlap your strokes a little bit. This way, you don’t get any missed spots or weird lines where one roller pass ends and the next begins. If you notice any areas that look a bit thin or patchy after the first coat, don’t worry too much. That’s what the next coats are for.
Tips for Multiple Coats and Touch-Ups
Most concrete projects will need at least two coats, sometimes three, depending on the paint color and the surface. The most important thing here is to let each coat dry completely before you put on the next one. Seriously, check the paint can for the recommended drying time. Rushing this step is a surefire way to end up with peeling or a finish that just doesn’t look right. For touch-ups, like if you accidentally nicked a spot or if there are some minor imperfections, it’s best to use a small brush. Try to feather the edges of the touch-up so it blends in with the rest of the painted surface. It’s a bit of an art, but it makes a big difference in the final look.
Proper application of each coat, with adequate drying time in between, is key to a durable and attractive finish. Patience during this stage will save you headaches down the road and ensure your painted concrete looks great for years to come.
Wrapping Up Your Concrete Painting Project
So, you’ve learned a lot about picking the right paint for your concrete surfaces. Whether you’re going for a simple refresh on a patio or a tough finish in the garage, the key is really in the prep work and choosing a product made for concrete. Remember, a little extra time spent cleaning, repairing, and priming can make a huge difference in how long your paint job looks good. Don’t forget to consider how much foot traffic or wear and tear the area gets when you make your final choice. With the right paint and a bit of effort, you can totally transform those drab concrete areas into something much more appealing.
Frequently Asked Questions
What’s the main difference between acrylic latex and epoxy paint for concrete?
Acrylic latex paint is water-based and easier to use, like regular house paint. It’s good for walls or areas with less foot traffic. Epoxy paint is tougher and lasts longer, especially on floors that get a lot of use, like garages. It’s a two-part mix that’s more durable but a bit trickier to apply.
Why is preparing the concrete surface so important before painting?
Concrete is naturally porous, like a sponge. If you don’t clean and prep it right, the paint won’t stick well. This means it could peel or chip off easily, especially on floors. Proper prep, like cleaning, fixing cracks, and sometimes etching, helps the paint grab onto the surface for a lasting finish.
Can I just use any exterior paint on my concrete patio?
No, it’s best to use paints made specifically for concrete. Regular exterior house paints might crack or peel because they aren’t designed to handle the way concrete expands and contracts with temperature changes. Paints made for concrete have special ingredients to stick better and last longer outdoors.
Does the finish of the paint matter for concrete floors?
Yes, the finish can affect how the floor looks and feels. Glossy finishes look shiny and are easy to clean, but they can also be slippery, especially when wet. Matte or satin finishes might offer better grip. Some paints even have added grit to make them less slippery.
How long will painted concrete last?
It really depends on the type of paint and how much wear the surface gets. Acrylic latex paint might last a few years on a floor before needing a touch-up, but it can last longer on walls. Epoxy paint is much more durable and can last many years, especially on high-traffic areas like garage floors.
What’s the best way to make sure my painted concrete doesn’t look streaky?
To get an even look, make sure you stir the paint well before you start. Apply the paint in thin, even coats using a roller with a good nap. Avoid overloading your roller. If you need multiple coats, let the first coat dry properly according to the paint’s instructions before adding the next one.


Leave a comment