

So, you want to get into animation using Krita? It’s a pretty neat program, and honestly, it’s not as scary as it might seem at first. This guide is all about taking you from zero to actually making things move on your screen. We’ll cover the basics, show you how to use the tools, and get you animating your own characters and ideas. Think of it as a friendly chat about making your art come alive.
Key Takeaways
- Start with the basics of animation concepts and keyframing to understand how movement is created.
- Get familiar with Krita’s interface and tools before starting your first animation project.
- Learn character rigging and lip-syncing to make your characters move and speak realistically.
- Explore visual effects and motion graphics to add polish and interest to your animations.
- Understand how to export your work and share it effectively.
Understanding Krita Animation Fundamentals
Getting into animation with Krita is a pretty cool journey, and understanding the basics is like learning your ABCs before writing a novel. It’s all about making static things move and tell a story. Even with all the fancy new tools out there, the core ideas stay the same. Think of it as the foundation for everything you’ll create.
Introduction to Animation Concepts
Animation is basically the art of making pictures move. It’s how we bring characters and scenes to life, creating illusions of movement and change over time. Whether you’re drawing frame by frame or using software to help, the goal is to create a sequence of images that, when shown quickly, trick your brain into seeing motion. This involves understanding timing, spacing, and how objects behave in the real world, even if you’re creating something totally fantastical.
Keyframe Animation Essentials
Keyframe animation is a big deal in digital animation. Instead of drawing every single little movement, you just mark the important points in time – these are your keyframes. So, you might draw a character at the start of a jump (keyframe 1) and then draw them at the peak of the jump (keyframe 2). The software then figures out all the drawings in between, which is called "tweening." This saves a ton of time. The better you place your keyframes, the more natural and controlled your animation will look.
Here’s a quick look at how it works:
- Start Point: Define the initial position or state of your object.
- End Point: Define the final position or state.
- In-betweens: The software calculates the frames between these points.
The Role of Storyboarding in Krita
Before you even touch Krita’s animation tools, a storyboard is your best friend. It’s like a comic strip version of your animation, showing each scene and key action. This visual plan helps you figure out the flow, character poses, camera angles, and even rough timing. It’s way easier to change a drawing on paper or a digital sketch than to redo animation frames later on. A good storyboard makes the whole animation process much smoother.
Think of a storyboard as your roadmap. It should include:
- Visuals for each shot.
- Notes on character actions and expressions.
- Ideas for camera movement and angles.
- Rough timing or dialogue cues.
Getting Started with Krita Animation
So, you’ve got Krita installed and you’re ready to actually start making something move. It can feel a bit much when you first open it up, right? All those buttons and panels. But honestly, it’s not as scary as it looks. Think of it like setting up your art studio – you want your brushes and paints where you can easily grab them. Krita lets you do just that.
Choosing the Right Krita Tools
Krita has a ton of brushes, and that’s one of its best features. For animation, you’ll probably want to stick to brushes that give you clean lines, like a good old-fashioned pencil or ink brush. You can find these in the Brush Presets docker. Don’t get too lost in trying every single brush right away; pick a couple that feel good in your hand, so to speak, and start with those. You can always explore more later. Remember, Krita is a really capable free digital art application, so you’re not missing out on features by not paying for software.
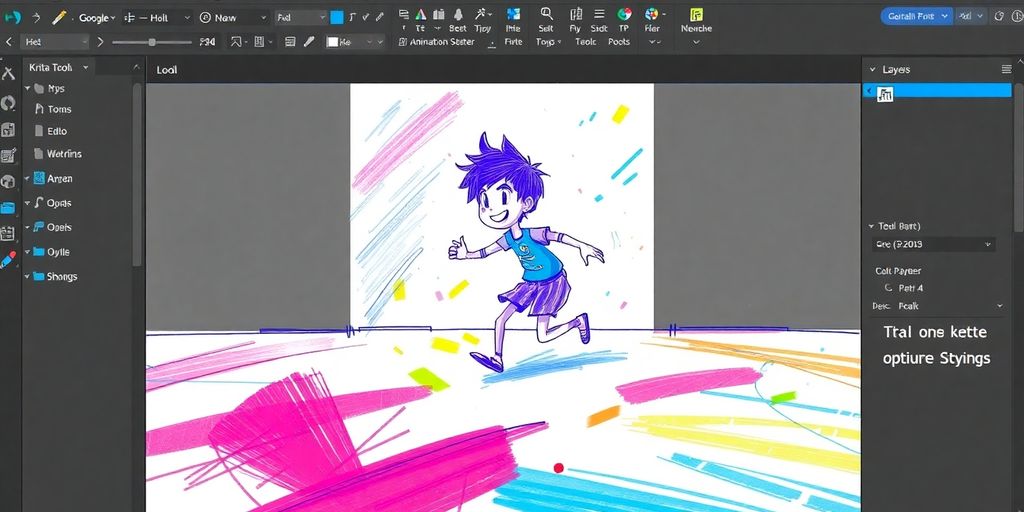
Navigating the Krita Interface
When you first open Krita, you’ll see a main window with menus at the top and various panels, called ‘dockers’, around the edges. The top menu bar has your standard File, Edit, View options, but the real magic for animation happens in the dockers. You’ll want to get familiar with the Timeline docker, which is where you’ll manage your frames. If you don’t see it, go to Settings > Dockers and select Animation or Timeline. The Toolbar, usually on the left, has your drawing tools, and the Options Bar, just below the top menu, changes depending on which tool you’ve selected. It’s all about getting comfortable with where things are. You can drag and drop these dockers to arrange your workspace however you like. Customizing your layout is key to a smooth workflow.
Creating Your First Krita Animation Project
Let’s make a simple bouncing ball. It’s a classic for a reason! First, create a new file (File > New). For animation, you’ll want to set your frame rate. A common starting point is 24 frames per second (fps), which gives a nice, film-like motion. Then, open the Timeline docker. Click the ‘+’ button to add a new frame. Draw your ball at the top of the screen on the first frame. Add another frame, move the ball down a bit, and draw it there. Keep adding frames and moving the ball down until it hits the ‘ground’. Then, you’ll start moving it back up. Use the onion skinning feature (you can usually find a button for it in the Timeline docker) to see your previous frames as you draw the next one. This helps you keep the movement consistent. Don’t worry if it’s not perfect; the goal is to get a feel for the process.
Animation is really about observing how things move in real life and then breaking that down into small steps. Look at how a ball bounces, or how a person walks. Try to capture that feeling in your drawings.
Bringing Characters to Life in Krita
Now that you’ve got the basics down, let’s talk about making your characters actually move and feel alive in Krita. It’s not just about drawing; it’s about bringing them to life through animation. This section will walk you through some key techniques to achieve that.
Exploring Character Rigging Basics
Rigging is like giving your character a skeleton. It’s a set of controls that let you pose and move different parts of your character easily, without redrawing everything from scratch for every single frame. Think of it like a puppet with strings. In Krita, you can achieve this using layers and groups. You’ll want to separate your character’s body parts onto different layers – like arms, legs, head, and torso. Then, you can group these layers and use transformations (like moving, rotating, or scaling) on these groups to animate. For more complex rigs, you might look into Krita’s transform tools and how they interact with layer transformations. It takes some practice, but once you get the hang of it, animating character poses becomes much faster.
Mastering Lip-Syncing Techniques
Getting your character’s mouth to match their dialogue is a big part of making them believable. For simple animations, you can create a few different mouth shapes (like open, closed, ‘ooh’, ‘eee’) and switch between them on a separate layer that follows the character’s head movement. You’ll want to time these changes precisely with the audio. A good way to start is by listening to the dialogue and marking down when each sound occurs. Then, you can go frame by frame, or use Krita’s timeline to swap out the mouth shapes accordingly. It’s all about matching the visual to the sound.
Animating Character Movement
When it comes to making your character walk, run, or even just blink, it’s about creating the illusion of smooth motion. This usually involves breaking down the movement into key poses and then filling in the frames in between, known as ‘in-betweens’. For a walk cycle, for example, you’d draw the contact pose (foot hitting the ground), the down pose (body at its lowest), the passing pose (foot passing the other leg), and the up pose (body at its highest). Then, you’d create the frames that connect these poses. Krita’s onion skinning feature is super helpful here, letting you see previous and next frames as you draw, so you can ensure your movements flow naturally. Remember to consider the weight and timing of the movement to make it look realistic.
Enhancing Your Krita Animations
Once you’ve got the basics of animation down, it’s time to really make your projects shine. Krita offers a bunch of ways to add that extra polish, making your animations more dynamic and professional. We’re going to look at how to use visual effects, incorporate other art styles, and play with motion graphics.
Leveraging Visual Effects in Krita
Visual effects, or VFX, can add a lot of impact to your animation. Think about adding glows, blurs, or even particle effects to make things pop. Krita has built-in filters and layer effects that are pretty handy for this. You can adjust things like blur intensity or glow color to get just the right look. For instance, if you have a character casting a spell, you might want to add a glowing aura around their hands. Or maybe a subtle blur to a fast-moving object to give it a sense of speed.
Here are a few effects you might want to try:
- Glow: Makes parts of your image appear to emit light.
- Blur: Softens edges or creates a sense of motion.
- Color Adjustments: Tweak hues, saturation, and brightness to set a mood.
- Distort Filters: Like Liquify or Warp, for more stylized effects.
Experimenting is key here. Don’t be afraid to layer effects or use them in combination with different layer modes to see what interesting results you can get. You can even create custom brush presets that have built-in effects.
Incorporating Vector Art and Illustrations
Krita isn’t just for raster animation; you can also bring in vector graphics. This is super useful if you’ve created logos, text elements, or even character parts in a vector program. Because vector art is resolution-independent, it stays sharp no matter how much you scale it. You can import SVG files directly into Krita. Once they’re in, you can treat them like any other layer, animating them or using them as part of your scene. This is great for adding clean, crisp titles or graphic elements to your animated sequences. It really helps to mix different art styles within a single project, giving it a unique feel. You can even use Krita’s own vector tools to create shapes and lines that you can animate.
Utilizing Motion Graphics
Motion graphics is all about animating graphic design elements. This can include things like animated text, shapes, and abstract patterns. Krita can handle this pretty well, especially if you combine its animation tools with its vector capabilities. For example, you could animate a logo reveal with dynamic text effects. Or create animated backgrounds with moving geometric shapes. The pop-up palette is a real time-saver for quickly accessing your favorite brushes and tools. It’s a shortcut system that lets you bring up commonly used items without digging through menus. To access it, just right-click anywhere on your canvas. You can customize what appears in this radial menu, making your workflow much smoother. This is especially helpful when you’re jumping between different types of animation, like character work and motion graphics.
Krita’s flexibility means you can tailor your workspace and tools to fit your specific animation needs. Whether you’re adding subtle visual effects, integrating sharp vector graphics, or creating dynamic motion graphics, the program provides the means to achieve a polished final product. Don’t forget to explore the various dockers and settings to find what works best for your personal workflow. You might find that customizing your toolbars and workspaces significantly speeds up your process, allowing you to focus more on the creative aspects of animation. It’s all about making the software work for you, not the other way around. For more on customizing your setup, check out the Krita documentation.
Remember, the goal is to make your animations more engaging and visually interesting. By adding these elements, you can take your projects from simple to spectacular. It’s all about adding that extra layer of professionalism and creativity to your work. Keep experimenting, and you’ll find your own unique style in no time.
Advanced Krita Animation Techniques
Once you’ve got a handle on the basics, Krita offers some really cool ways to push your animations further. We’re talking about making things look more professional, adding depth, and generally just making your work pop. It’s not about reinventing the wheel, but about using the tools Krita gives you in smarter ways.
Exploring 3D Animation Possibilities
While Krita is primarily known for its 2D capabilities, it can actually play a role in 3D animation workflows, especially when you’re starting out or working with simpler projects. You can prepare 2D assets like textures or character sprites within Krita that can then be imported into dedicated 3D software. Think of Krita as your go-to for creating the visual elements that will later be given depth and volume elsewhere. For instance, you could design a character’s face in Krita, export it as a texture map, and then apply it to a 3D model in a program like Blender. This hybrid approach can be quite efficient.
Integrating AI Animation Tools
Artificial intelligence is changing how we animate, and you can bring some of that power into your Krita projects. AI tools can help with tasks like generating in-between frames, creating motion cycles, or even suggesting animation paths based on simple inputs. You might use an AI tool to generate a complex particle effect, then import that sequence as a video or image sequence into Krita to composite with your 2D animation. Some AI tools can even help with rigging, suggesting bone placements for characters you’ve drawn in Krita. It’s about using AI to speed up repetitive tasks or to achieve effects that would be very time-consuming to do manually.
Optimizing Workflow with Templates
If you find yourself doing similar setups repeatedly, templates are your best friend. You can create a Krita document with pre-set layers, color palettes, animation timelines, and even basic animation cycles already in place. For example, if you animate a lot of characters with similar movement styles, you could set up a template with a basic walk cycle that you can then duplicate and modify for each new character. This saves a ton of time and helps maintain consistency across your projects. Think about what parts of your animation process take the longest and see if you can build a template to streamline them. It’s a practical way to make your animation process much smoother.
Setting up custom templates in Krita can significantly cut down on repetitive setup tasks. This allows you to focus more on the creative aspects of animation rather than the technical groundwork for each new project. It’s a smart way to work efficiently.
Exporting and Sharing Your Krita Creations
So, you’ve poured your heart into an animation in Krita, and now it’s time to show it to the world. This part is all about getting your finished piece out of Krita and into a format that others can see and enjoy. It might seem a bit technical, but it’s really just about choosing the right settings for your project.
Understanding Export Settings
When you’re ready to export, Krita gives you a lot of control. You can export your animation as a video file, like an MP4 or WebM, or as a sequence of images. The choice often depends on where you plan to share it or if you need to do further editing elsewhere. For video exports, you’ll want to pay attention to the frame rate and resolution to make sure it looks smooth. If you’re exporting as an image sequence, each frame becomes a separate file, which is great for more complex workflows or if you’re using the animation in a game engine. Krita supports exporting to various formats, including PNG, JPG, and video files.
Best Practices for Sharing Animations
Think about where your animation will be viewed. If it’s for social media, you might want a smaller file size and a common format like MP4. For a portfolio or a website, you might opt for higher quality. It’s also a good idea to embed your author information into the exported files. This way, people can see who made the animation. You can set this up in the Krita settings, and it will be included in the metadata of your exported images, like PNGs and JPGs. This is a simple way to get credit for your work.
Tips for Concise and Engaging Videos
When you’re exporting as a video, consider the length. Shorter, punchier animations often perform better online. You can trim your animation directly in Krita before exporting, or use the export settings to define the start and end frames. Also, make sure your audio is properly synced if you’ve added sound. A well-timed animation with good audio makes a big difference in how engaging it is for the viewer. Remember to check your export settings carefully to avoid any surprises with the final output.
Getting your animation out of Krita is the final step in bringing your ideas to life. Taking a moment to understand the export options will help ensure your hard work looks its best when shared.
Keep Creating!
So, you’ve taken the first steps into the world of Krita animation. It might seem like a lot at first, but remember that every pro animator started right where you are now. Don’t be afraid to experiment, make mistakes, and just keep drawing. The most important thing is to have fun with it and let your ideas flow. Keep practicing those keyframes, playing with your storyboards, and exploring all the cool effects Krita has to offer. You’ve got this!
Frequently Asked Questions
What is Krita, and why is it good for animation?
Krita is a fantastic free tool for making animations! It’s like a digital sketchbook that lets you draw frame by frame, kind of like a flipbook. You can also use it for more advanced stuff like making characters move smoothly using keyframes. It’s great for both simple cartoons and more detailed projects.
What are keyframes in animation, and how do they work in Krita?
Keyframes are like important snapshots in your animation. You tell Krita where you want a character or object to be at a certain point, and Krita automatically fills in the steps in between. This is called ‘tweening,’ and it saves you a ton of time compared to drawing every single movement yourself.
Why is storyboarding important for an animation project?
Storyboarding is like creating a comic strip version of your animation before you start drawing the real thing. It helps you plan out each scene, showing where characters will be, what they’ll do, and how the camera will move. This makes the animation process much smoother and helps you tell your story clearly.
Can I animate characters and make them talk in Krita?
Yes, Krita has tools for making your characters move! You can add a ‘skeleton’ or ‘rig’ to your characters, which lets you pose and move different parts of their body. For making mouths match speech, Krita can help with lip-syncing by letting you draw different mouth shapes for different sounds.
How can I add visual effects or make my animations look more professional in Krita?
You can add cool effects like smoke, fire, or even sparkles using Krita’s particle brushes. Simple transitions between scenes, like fading or sliding, can also make your animation look more professional. Experimenting with colors can also change the mood of your animation.
Can Krita be used for 3D animation or with AI animation tools?
Yes, Krita can be used with other free tools for 3D animation, like Blender. While Krita is mainly for 2D, you can use it to create 2D elements for 3D projects or even animate 2D characters that interact with 3D scenes. Many AI tools can also help create 3D animations from simple inputs.


Leave a comment