

Want to give your kitchen a fresh look without spending a ton of money? Painting kitchen cupboards is a smart way to do it. It can totally change how your kitchen feels and looks. This guide will walk you through everything you need to know about painting kitchen cupboards, from getting them ready to picking the right paint and making sure they look great. Let’s get started on making your kitchen awesome!
Key Takeaways
- Painting kitchen cupboards is a budget-friendly way to update your kitchen’s style.
- Proper cleaning and preparation of your cupboards are super important for a good paint job.
- Picking the right kind of paint makes a big difference in how long your painted cupboards will last.
- Applying paint in thin, even layers and sanding between coats helps get a smooth finish.
- Before painting over old cupboards, check their condition and be ready to strip old paint if needed.
Why Consider Painting Kitchen Cupboards?
Painting your kitchen cupboards might seem like a big job, but honestly, it’s one of the most impactful things you can do to refresh your kitchen without spending a fortune. It’s way cheaper than replacing everything, and you get to put your own stamp on the space. Plus, a fresh coat of paint can really brighten things up. Let’s get into the specifics:
Cost-Effective Kitchen Transformation
Painting your kitchen cupboards is a budget-friendly alternative to a full-blown remodel. Think about it: new cabinets can cost thousands, while a can of paint, some brushes, and a bit of elbow grease will set you back significantly less. It’s a great way to update the look of your kitchen without breaking the bank. You can use the money you save for other upgrades, like new appliances or countertops. It’s a win-win!
Personalized Kitchen Aesthetics
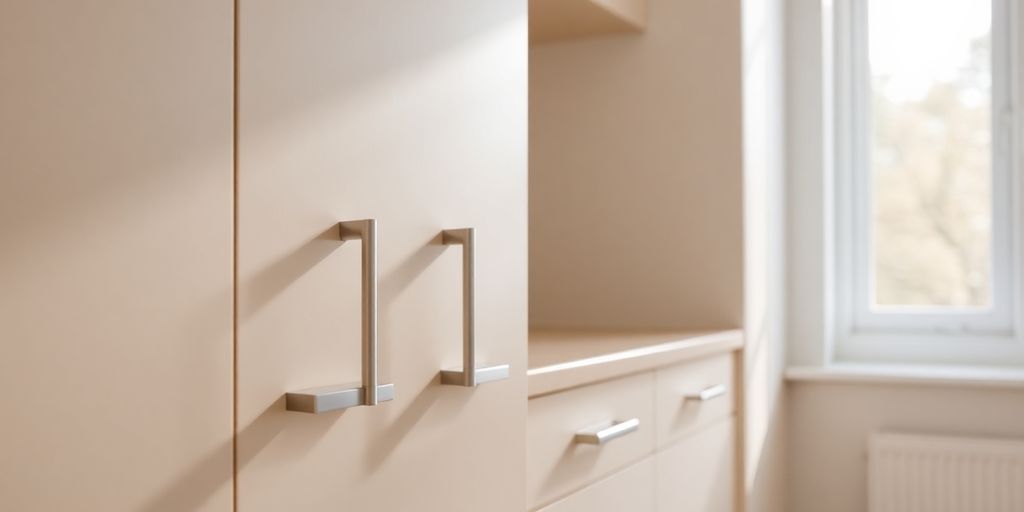
One of the best things about painting your cupboards is the ability to completely customize the look of your kitchen. You’re not stuck with whatever styles or colors the cabinet manufacturers offer. Want a bold, modern look? Go for it! Prefer something more classic and understated? No problem. You can choose any color and finish that matches your personal style and the overall aesthetic of your home. It’s all about making your kitchen a space you truly love. Consider the hardware too, as that can also be updated to match your new paint color.
Boosting Home Value
A fresh, updated kitchen can significantly increase your home’s appeal and value. Potential buyers love a clean, modern kitchen, and painting your cupboards is an easy way to achieve that look. Even if you’re not planning on selling anytime soon, a well-maintained kitchen is a great investment in your home’s long-term value.
Here’s a quick look at how painting can impact your home’s value:
- Improved aesthetics: A fresh coat of paint makes your kitchen look newer and more appealing.
- Increased marketability: A modern kitchen is a major selling point for potential buyers.
- Enhanced overall impression: A well-maintained kitchen gives the impression that the entire home is well-cared for.
And remember, it’s not just about the color. Using high-quality paint and taking the time to do the job right can make all the difference. So, grab your brushes and get ready to transform your kitchen!
Essential Preparation for Painting Kitchen Cupboards
Painting your kitchen cupboards can totally change the look of your kitchen, but skipping the prep work is a recipe for disaster. Trust me, I’ve learned this the hard way! You might think you can just slap some paint on and call it a day, but you’ll end up with a finish that chips, peels, and looks awful in no time. Taking the time to prep properly is what separates a DIY fail from a kitchen you’ll actually be proud of. So, let’s get into the nitty-gritty of how to get your cabinets ready for their makeover.
Thorough Cabinet Inspection and Cleaning
First things first, you need to give your cabinets a good once-over. Look for any damage like cracks, dents, or loose hardware. It’s way easier to fix these problems before you start painting. Think of it like prepping a canvas – you wouldn’t paint over a hole, would you?
Next up: cleaning. Kitchen cabinets get gross, plain and simple. Grease, food splatters, dust – it all builds up over time. You’ll need to scrub them down with warm water and a gentle detergent. For tough grease spots, a degreaser is your best friend. Pay special attention to areas around the stove and sink; those are usually the worst offenders. Make sure the cabinets are completely dry before moving on to the next step.
Removing Hardware and Doors
This might seem like a pain, but trust me, it’s worth it. Taking off all the hardware (knobs, pulls, hinges) and doors makes painting so much easier. You’ll get a much cleaner, more professional finish. Plus, you won’t have to worry about accidentally painting your hardware or getting paint buildup around the edges.
Keep all the little pieces (screws, hinges, etc.) in a safe place. I like to use labeled baggies so I know exactly where everything goes when it’s time to reassemble. It’s also a good idea to label the doors and cabinets so you know which door goes where. Trust me, you’ll thank yourself later when you’re not trying to figure out which door fits which cabinet!
Degreasing Cabinet Surfaces
Even if you think your cabinets are clean after the initial wash, degreasing is still a must. Grease can prevent paint from sticking properly, leading to chipping and peeling down the road. Use a dedicated degreaser to really cut through any remaining grime. Follow the instructions on the degreaser carefully, and make sure to rinse the cabinets thoroughly afterward. Let them dry completely before moving on to sanding. This step is super important for cabinet makeovers, so don’t skip it!
Proper preparation is the secret weapon for a long-lasting and beautiful cabinet paint job. Rushing through these steps will only lead to frustration and a less-than-perfect finish. Take your time, do it right, and you’ll be amazed at the results.
Selecting the Right Paint for Kitchen Cupboards

Choosing the right paint is super important for kitchen cupboards. It’s not just about color; it’s about how well the paint holds up to daily use, splashes, and cleaning. You don’t want to repaint every year, right?
Understanding Paint Types and Durability
Different paints offer different levels of durability and finish. Latex paints are easy to clean and have low VOCs, making them a popular choice. Oil-based paints provide a super hard finish but take longer to dry and require more ventilation. Acrylic paints are another good option, offering a balance of durability and ease of use. Consider where your cabinets are located. Are they near the stove? Near the sink? This will help you decide on the level of durability you need. For example, if you want to use cabinet-specific paints, you’ll need to consider the type of material your cabinets are made of.
Considering Your Desired Finish
The finish you choose affects the overall look and feel of your kitchen. Matte finishes hide imperfections well but can be harder to clean. Semi-gloss and gloss finishes are easier to wipe down but show every bump and scratch. Satin finishes are a good middle ground, offering a smooth look with decent cleanability. Think about the style of your kitchen. A modern kitchen might look great with a high-gloss finish, while a more traditional kitchen might benefit from a satin or matte finish. Also, consider the lighting in your kitchen. A glossy finish can reflect a lot of light, which can be a good or bad thing depending on your space.
Choosing High-Quality Paint
Don’t skimp on paint! Cheaper paints might seem like a good deal, but they often require more coats, don’t last as long, and can be harder to work with. High-quality paints offer better coverage, durability, and a more professional-looking finish. It’s an investment that pays off in the long run. Plus, better paint is often easier to apply, saving you time and frustration. Consider these points when choosing your paint:
- Coverage: How many coats will you need?
- Durability: How well will it hold up to cleaning and wear?
- Ease of Application: Is it easy to apply without drips or streaks?
Choosing the right paint can feel overwhelming, but it’s worth taking the time to research your options. Talk to the folks at your local paint store, read reviews, and consider your specific needs and preferences. A little extra effort upfront can make a big difference in the final result.
Achieving a Flawless Finish When Painting Kitchen Cupboards
Okay, so you’ve prepped your cabinets and picked out the perfect paint. Now comes the part where you actually make them look amazing. It’s all about the technique here, and taking your time. Trust me, rushing this step will only lead to frustration and a less-than-stellar result. Let’s get into the details.
Applying Even, Thin Coats
The key to a smooth finish is applying multiple thin coats rather than one thick one. Think of it like building up layers of perfection. Thick coats are more likely to drip and create an uneven texture. I usually use a high-quality brush for the corners and any detailed areas, then switch to a mini foam roller for the larger, flat surfaces. This helps minimize brush strokes and gives a more uniform look. Remember to let each coat dry completely before moving on to the next. I know it’s tempting to rush, but patience is your friend here. For the best results, consider using self-leveling paint.
Sanding Between Coats for Smoothness
This is a step that many people skip, but it makes a huge difference. Lightly sanding between coats removes any imperfections, like dust particles or small drips, and creates a super smooth surface for the next coat of paint to adhere to. I use a fine-grit sandpaper (around 220 grit) and gently sand the entire surface. Make sure to wipe away all the sanding dust with a tack cloth or a slightly damp rag before applying the next coat of paint. This step ensures a flawless finish. It’s a little extra work, but totally worth it in the end.
Reinstalling Hardware and Doors
Once the final coat of paint is completely dry, it’s time to put everything back together. This is where you’ll really see your hard work pay off. Before you start, consider upgrading your cabinet hardware for a fresh, new look. It’s a small change that can make a big impact. Carefully reattach the hinges and doors, making sure everything is aligned properly. If you took photos before disassembling everything (which I highly recommend!), now’s the time to refer back to them. Stand back and admire your beautifully transformed kitchen cabinets! You did it!
Painting kitchen cabinets is a rewarding DIY project, but it requires patience and attention to detail. Don’t rush the process, and take the time to do each step correctly. The results will be well worth the effort.
Tips for Painting Over Existing Kitchen Cupboards
Painting over existing kitchen cupboards can be a great way to refresh your kitchen without the expense of replacing them. However, it’s not always as straightforward as painting new cabinets. Here’s what you need to consider:
Assessing Current Cabinet Condition
Before you even think about picking up a brush, take a good, hard look at your cabinets. Are they solid wood, laminate, or something else? Is the existing finish in good shape, or is it peeling, cracking, or chipping? The condition of your cabinets will dictate the amount of prep work required. If the existing finish is failing, painting over it will only amplify those problems. Cabinets in poor condition might need more extensive work, like stripping, before you can even think about painting. If the old paint is in good shape, a primer is essential to promote adhesion and create a suitable base for your new paint.
Stripping for a Clean Slate
Sometimes, the best approach is to start fresh. If your cabinets have multiple layers of old paint, a damaged finish, or a color you absolutely despise, stripping them down to the bare wood might be the way to go. This is definitely more work, but it gives you a clean slate to work with and ensures better adhesion for your new paint. Stripping can be done chemically or manually with a scraper and sandpaper. Chemical stripping is faster, but it requires proper ventilation and safety precautions. Manual stripping is less messy but more labor-intensive. If you aim for a complete color change and a uniform, professional look, it’s generally better to strip the existing paint or finish. Stripping the old paint or finish allows you to begin with a clean slate and achieve a more consistent and high-quality result.
Importance of Diligent Preparation
No matter what, preparation is key. Even if you’re just painting over an existing finish, you need to clean, sand, and prime your cabinets properly. Here’s a quick rundown:
- Cleaning: Remove all grease, grime, and dirt with a degreaser. Kitchen cabinets are magnets for this stuff!
- Sanding: Lightly sand the existing finish to create a slightly rough surface for the primer to grip onto. Use fine-grit sandpaper.
- Priming: Apply a high-quality primer. This is especially important if you’re painting over a dark color or a glossy finish. For stained wood cabinets, sanding and priming are crucial to prevent the stain from bleeding through the new paint. Using stain-blocking primers is particularly effective in this scenario.
Skipping steps in the preparation process will almost always lead to a poor finish that won’t last. Take the time to do it right, and you’ll be much happier with the results.
Wrapping It Up
So, there you have it. Painting your kitchen cabinets might seem like a big job, but it’s totally doable. It’s a great way to give your kitchen a fresh look without spending a ton of money on a full remodel. Just remember to take your time with the prep work – cleaning, sanding, and priming are super important. Pick out good quality paint, and don’t rush the painting part. A little patience goes a long way here. When you’re done, you’ll have a kitchen that feels brand new, and you can be proud you did it yourself. It’s a pretty satisfying feeling, trust me.
Frequently Asked Questions
Why should I bother painting my kitchen cupboards?
Painting your kitchen cupboards is a smart move if you want to update your kitchen without spending a lot of money. It’s much cheaper than buying new cupboards, lets you pick any color you like to match your home, and can even make your house worth more if you ever decide to sell it. It’s a quick way to give your kitchen a fresh, new look.
What’s the most important thing to do before I start painting?
To get your cupboards ready for paint, you need to first clean them really well to get rid of any dirt or grease. Then, take off all the handles, knobs, and doors. If there are any rough spots, sand them smooth. This careful preparation helps the paint stick better and makes the final job look much nicer.
What kind of paint is best for kitchen cupboards?
For kitchen cupboards, you need a paint that’s tough and easy to clean. Oil-based paints are super strong, but latex paints are also good because they’re easier to clean up and don’t have as many fumes. Think about what kind of shine you want – matte, satin, or glossy – and always pick a paint that’s made to last in a busy kitchen.
How can I make my painted cupboards look really good?
To make your painted cupboards look professional, apply several thin coats of paint instead of one thick one. Let each coat dry completely, and lightly sand between coats to make sure the surface is super smooth. Once the paint is dry, put all the hardware and doors back on carefully.
Can I paint over my old kitchen cupboards, or do I need to do something else first?
Yes, you can paint over existing cupboards, but you need to check their current condition first. If they’re in bad shape, you might need to strip off the old paint completely. No matter what, cleaning, sanding, and priming are super important steps to make sure the new paint looks great and lasts a long time.
How long does it usually take to paint kitchen cupboards?
The time it takes depends on how many cupboards you have and how much prep work is needed. Generally, it can take anywhere from a few days to a week, including drying times between coats. It’s a project that requires patience, but the results are worth it!


Leave a comment