
So, you wanna try watercolour water painting? It’s a pretty cool way to make art, and it’s not as hard as you might think to get started. This guide will walk you through everything, from picking out your first set of paints to getting those vibrant colors just right. We’ll cover the basics, some neat tricks, and even how to fix things if they don’t go exactly as planned. Get ready to splash some color around and see what you can create with watercolour water painting!
Key Takeaways
- Gathering the right stuff, like good paints, brushes, and paper, makes a big difference in watercolour water painting.
- Learning simple techniques, such as washes and wet-on-wet, helps you get a feel for how the paint moves.
- Knowing a bit about color mixing and layering lets you create more interesting and deep artwork.
- Practice with small projects, like landscapes or flowers, to build your skills and confidence in watercolour water painting.
- Don’t be afraid to try new things and make mistakes; it’s all part of finding your own style in watercolour water painting.
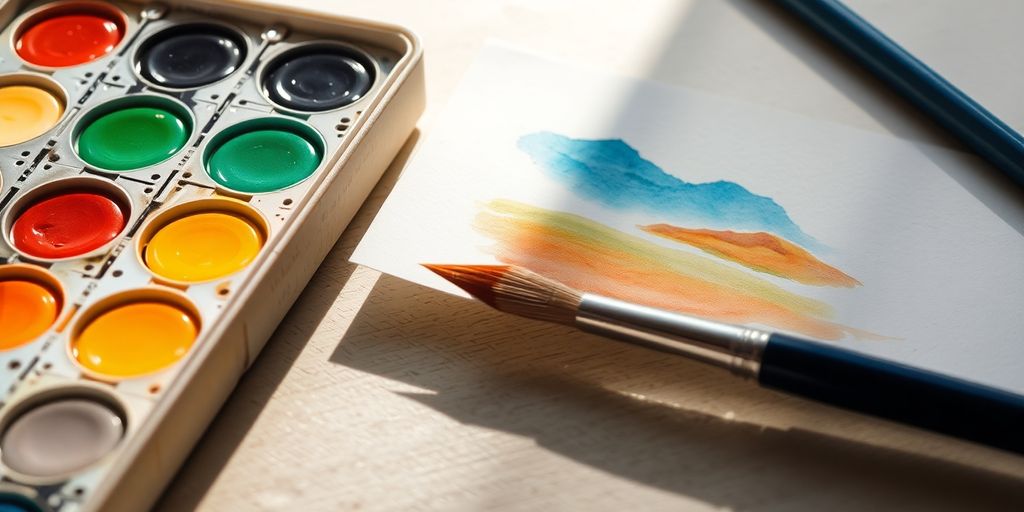
Essential Supplies for Watercolour Water Painting

Before you even think about putting brush to paper, you need to gather the right tools. Trust me, having decent supplies makes a world of difference. It’s like trying to cook a gourmet meal with dollar-store utensils – possible, but not exactly enjoyable. Let’s break down the essentials.
Selecting Quality Watercolour Paints
Okay, so paints are kind of important, right? You don’t need to break the bank when you’re starting out, but avoid the super cheap stuff that’s mostly filler. Student-grade paints are a good place to begin. They offer decent pigment quality without the hefty price tag of professional-grade paints. Look for sets with a good range of colors, or buy individual tubes of colors you know you’ll use a lot. I personally started with a basic set of 12 colors and expanded from there. It’s also worth considering pan sets versus tube paints. Pans are convenient for travel and quick sketches, while tubes allow you to mix larger quantities of color. Artecho watercolor paint set is a good option to start with.
Choosing the Right Brushes for Watercolour
Brushes are another area where quality matters. Cheap brushes tend to shed hairs all over your painting, which is super annoying. Invest in a few good-quality brushes in different sizes and shapes. Round brushes are great for detail work, while flat brushes are good for washes. A medium-sized round brush is a good all-purpose option to start with. Synthetic brushes are generally more affordable and hold up well, but natural hair brushes (like sable) can hold more water and create smoother washes. Experiment to see what you like best. Don’t forget to clean your brushes properly after each use to extend their lifespan. I’ve ruined way too many brushes by letting paint dry in them!
Understanding Watercolour Paper Types
Paper is probably the most overlooked supply, but it’s crucial. Regular printer paper just won’t cut it – it’ll buckle and warp like crazy. You need paper specifically designed for watercolor. Look for paper that’s at least 140lb (300gsm). This weight can handle a decent amount of water without warping too much. There are three main types of watercolor paper: hot press, cold press, and rough. Hot press is smooth, good for detailed work. Cold press has a bit of texture, making it versatile for various techniques. Rough paper has the most texture, creating interesting effects. Cold press is a good starting point for beginners. Also, consider whether you want sheets, pads, or blocks. Blocks are glued on all four sides, preventing warping, which is a nice feature. I usually go for pads because they’re easy to store and transport.
Investing in the right supplies from the start can save you a lot of frustration down the road. It’s not about spending a fortune, but about choosing quality items that will help you learn and grow as an artist. Think of it as an investment in your creative journey.
Here’s a quick rundown of paper types:
| Paper Type | Texture | Best For | Notes |
|---|---|---|---|
| Hot Press | Smooth | Detailed work, fine lines | Dries quickly |
| Cold Press | Medium | Versatile, washes, textures | Most popular choice |
| Rough | Rough | Textural effects, landscapes | Can be challenging for beginners |
Fundamental Watercolour Water Painting Techniques
Mastering Basic Washes and Gradients
Okay, so washes and gradients are like, the foundation of watercolor. Seriously. If you can’t get these down, the rest is gonna be a struggle. A wash is basically a flat, even layer of color, and a gradient is a smooth transition from one color to another, or from a color to white. Getting the right water-to-paint ratio is key. Too much water, and you’ll get blooms (those annoying cauliflower-looking things). Not enough, and it’ll be streaky.
Here’s a super simple way to practice washes:
- Tape down your paper to a board. This helps prevent buckling.
- Mix your paint. You want it pretty watery, but not too watery.
- Tilt your board slightly. This helps the paint flow.
- Apply the paint in horizontal strokes, overlapping each stroke slightly.
- Let it dry completely before adding another layer.
Gradients are similar, but you gradually add more water to your brush as you go, so the color fades out. It takes practice, but it’s worth it. You can find a watercolor set to get started.
Exploring Wet-on-Wet Applications
Wet-on-wet is where things get interesting. This is when you apply wet paint to wet paper. The result? Soft, dreamy effects that are perfect for skies, water, and anything else that needs a bit of a hazy look. It’s also where you can lose control pretty quickly, so be warned!
- The paper needs to be evenly wet, but not soaking. If it’s too wet, the colors will just bleed everywhere.
- Use a large, soft brush. This will help you apply the paint smoothly.
- Don’t overwork it! The more you mess with it, the muddier it will get.
I remember the first time I tried wet-on-wet. I was trying to paint a sunset, and it looked like a total disaster. Colors were running everywhere, and it was just a big, muddy mess. I almost gave up, but I kept practicing, and eventually, I got the hang of it. Now, it’s one of my favorite techniques.
Practicing Dry Brush Effects
Dry brush is the opposite of wet-on-wet. You use a dry brush with very little paint to create textured effects. Think rough bark, dry grass, or the surface of rocks. It’s all about dragging the brush across the paper so that the paint only catches on the raised areas. It’s a great way to add detail and interest to your paintings. You can use watercolor techniques to create these effects.
Here’s how to do it:
- Use a stiff brush. A cheap, old brush works great for this.
- Wipe off most of the paint. You want the brush to be almost dry.
- Drag the brush across the paper with light pressure. Don’t press too hard, or you’ll lose the effect.
- Experiment with different brushes and papers to see what kind of textures you can create.
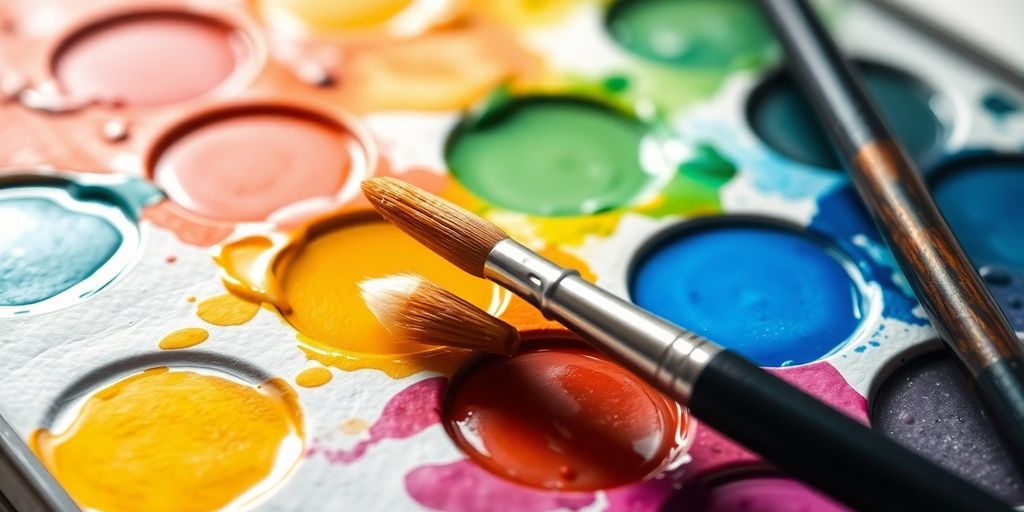
Color Theory in Watercolour Water Painting
Color theory can seem intimidating, but it’s really just about understanding how colors interact. It’s not about memorizing a bunch of rules, but more about developing an intuition for what looks good and why. When you get a handle on color, your paintings will really start to pop. I remember when I first started, I just threw colors together and hoped for the best. Let’s just say the results were… interesting. But once I started learning about color theory, things clicked.
Mixing Vibrant Hues
Mixing colors is where the magic happens! Don’t rely solely on pre-mixed colors from the tube. Experiment! You’ll be surprised at the amazing shades you can create. Start with a limited palette – maybe just a few primary colors – and see what you can come up with. It’s also important to understand the properties of your paints. Some pigments are more transparent than others, and some are more granulating. Knowing this will help you predict how they’ll behave when mixed. I like to keep a color mixing journal where I swatch different combinations and note their properties. It’s a great reference tool.
Here’s a simple guide to get you started:
- Start small: Add pigment gradually to avoid overpowering your mix.
- Mix thoroughly: Ensure the colors are fully blended for even results.
- Test your mixes: Always test the color on a scrap piece of paper before applying it to your painting.
Understanding Color Harmony
Color harmony refers to creating visually pleasing color combinations. There are several established color schemes you can use as a starting point. Think about analogous color schemes and how they can create a sense of calm and unity in your work. Complementary colors, on the other hand, offer contrast and excitement. Split-complementary, triadic, and tetradic schemes offer even more possibilities. Don’t be afraid to break the rules, though! Ultimately, the best color harmony is the one that achieves the effect you’re after.
Creating Depth with Layering
Layering, or glazing, is a key technique in watercolor for building depth and richness. It involves applying thin, transparent washes of color over previous layers. Each layer subtly alters the colors beneath, creating complex and luminous effects. When layering, it’s important to let each layer dry completely before applying the next. This prevents the colors from mixing and becoming muddy. Also, consider using cooler colors for receding areas and warmer colors for foreground elements to enhance the sense of depth.
Layering is your friend. Seriously. It’s how you get those amazing, subtle shifts in color that make watercolor paintings so captivating. Don’t rush it. Take your time and let each layer dry properly. You’ll be amazed at the results.
Step-by-Step Watercolour Water Painting Projects
Time to put those skills to the test! We’ve covered the basics, now let’s dive into some actual projects. These are designed to be approachable, even if you’re just starting out. Don’t worry about perfection; focus on learning and having fun. Each project will build on the techniques we’ve discussed, helping you gain confidence and develop your own style.
Painting Simple Landscapes
Landscapes are a great starting point because they offer a lot of room for experimentation. Start with a simple horizon line and build from there. Think about the basic shapes: mountains, trees, fields. Don’t get bogged down in details at first. Focus on capturing the overall mood and atmosphere. Here’s a simple approach:
- Sketch a light outline of your landscape.
- Apply a light wash for the sky, blending colors as you go.
- Add darker tones for the foreground, creating depth.
Remember, watercolor is all about layering. Let each layer dry before adding the next to avoid muddy colors. This is especially important when painting skies and water.
Capturing the Beauty of Flowers
Flowers can seem intimidating, but breaking them down into simple shapes makes them much easier to paint. Observe the petals, leaves, and stems carefully. Pay attention to the way light and shadow play across the surfaces. Consider these points when painting flowers:
- Start with a light sketch to guide your brush.
- Use a wet-on-wet technique for soft, blended petals.
- Add details with a dry brush once the base layers are dry.
Depicting Water Reflections
Water reflections can add a lot of interest to your paintings. The key is to understand how reflections work. They’re not perfect mirror images; they’re often distorted by ripples and waves. Here’s how to approach painting reflections:
- Paint the scene above the water first.
- Use a slightly darker and more muted palette for the reflection.
- Apply horizontal strokes to suggest the movement of the water. You can find a watercolor set online to get started.
| Element | Description |
|---|---|
| Sky | Soft, blended blues and pinks |
| Trees | Darker greens and browns, varied textures |
| Water | Muted colors, horizontal strokes |
Adding Detail and Texture in Watercolour Water Painting
So, you’ve got your basic washes down, and you’re feeling pretty good about your watercolor painting. But how do you take it to the next level? That’s where adding detail and texture comes in. It’s what separates a decent painting from a truly captivating one. Let’s explore some ways to do just that.
Techniques for Fine Lines and Details
Getting those crisp, fine lines in watercolor can be tricky, but it’s totally achievable with the right approach. First off, you’ll need a good brush – think small, like a size 0 or 1 round brush. Synthetic brushes often work well for detail because they hold their shape nicely. The key is to use minimal water on your brush and to apply gentle pressure.
- Use a pointed brush for sharp lines.
- Rest your hand on the table to steady it.
- Practice on scrap paper first to get a feel for the paint flow.
Creating Varied Textures
Texture can add so much visual interest to your paintings. There are tons of ways to create different textures, from dry brushing to using salt. Dry brushing involves using a brush with very little water to create a broken, scratchy effect. Salt, on the other hand, creates a speckled texture as it absorbs the wet paint. Experiment with different materials to see what effects you can achieve. You can even use things like sponges or textured paper to add unique patterns.
Here’s a quick guide to some texture techniques:
| Technique | Description | Best For |
|---|---|---|
| Dry Brushing | Using a dry brush with minimal paint to create a rough, scratchy texture. | Rocks, tree bark |
| Salt | Sprinkling salt on wet paint to create a speckled effect. | Snow, starry skies |
| Spattering | Flicking paint from your brush onto the paper. | Grass, foliage |
| Lifting | Removing paint with a clean, damp brush or sponge. | Clouds, highlights |
Using Lifting and Masking Fluids
Lifting and masking fluids are your secret weapons for preserving white areas and adding intricate details. Masking fluid (also called liquid frisket) is a rubbery substance that you paint onto the paper to protect areas from paint. Once the paint is dry, you can peel off the masking fluid to reveal the untouched paper underneath. Lifting, on the other hand, involves removing paint from the paper after it’s been applied. This can be done with a clean, damp brush or a sponge. It’s great for creating highlights or correcting mistakes. A watercolor set is a great way to start experimenting with these techniques.
Don’t be afraid to experiment! Watercolor is all about playing with different techniques and seeing what works for you. The more you practice, the more comfortable you’ll become with adding detail and texture to your paintings. So grab your brushes, and let’s get painting!
Troubleshooting Common Watercolour Water Painting Challenges
Preventing Muddy Colors
Okay, so you’re staring at your painting, and instead of a beautiful, vibrant scene, you’ve got…mud. We’ve all been there. Muddy colors usually happen when you overmix your paints or don’t let layers dry properly. Here’s what I’ve learned:
- Limit your palette: Start with a few key colors and mix from there. Too many colors competing can lead to mud.
- Clean your brush often: Rinse your brush thoroughly between colors to avoid contamination.
- Let layers dry: Patience is key! Ensure each layer is completely dry before adding another. This prevents colors from blending unintentionally.
I remember one time, I was trying to paint a sunset and got impatient. I kept layering colors on top of each other while they were still wet, and the whole thing turned into a brown mess. Lesson learned: let it dry!
Controlling Water Flow
Water is both your best friend and your worst enemy in watercolor. Too much, and you’ve got uncontrolled blooms; too little, and your paint won’t flow. It’s a balancing act. One thing that helped me was understanding how different paper types react to water. Experiment with different paper types to see what works best for you.
Here’s a quick guide:
| Paper Type | Water Absorption | Best For |
|---|---|---|
| Hot Press | Low | Fine details, smooth washes |
| Cold Press | Medium | General use, textured effects |
| Rough | High | Loose washes, dramatic textures |
Also, pay attention to your brush. A thirsty brush will suck up water, while a fully loaded brush will release it. Practice controlling the amount of water on your brush.
Fixing Mistakes Gracefully
Everyone makes mistakes, especially when starting out. The good news is that watercolor is surprisingly forgiving. Don’t panic! Here are a few ways to fix common errors:
- Lifting: Use a clean, damp brush to gently lift unwanted paint while it’s still wet. Blot with a paper towel.
- Blotting: For large areas of excess water or paint, use a clean paper towel to blot the area. This can lighten the color or remove unwanted blooms.
- Adding Layers: Sometimes, the best way to fix a mistake is to incorporate it into the painting. Add another layer of paint to correct the color or shape. Think of it as an opportunity to mix vibrant hues and experiment.
Don’t be afraid to experiment and learn from your mistakes. That’s how you grow as an artist! And remember, even the most experienced watercolorists have their share of
Developing Your Unique Watercolour Water Painting Style
It’s time to really make your mark! You’ve learned the basics, experimented with techniques, and hopefully, haven’t gotten too frustrated. Now, it’s about finding what makes your watercolors stand out. Don’t be afraid to break the rules a little (or a lot!).
Experimenting with Different Approaches
Try everything! Seriously. Don’t just stick to landscapes if you secretly want to paint portraits. Mix media – add some ink, colored pencils, or even collage elements. The point is to see what clicks. Maybe you love super-detailed work, or maybe you’re all about loose, expressive washes. There’s no right or wrong, just what feels good to you. Think about trying different watercolor papers to see how they affect your style.
Here are some ideas to get you started:
- Limited Palette: Restrict yourself to just 2-3 colors and see what you can create.
- Large Format: Work on a much bigger piece of paper than you usually do.
- Abstract: Forget about painting anything recognizable and focus on color and texture.
Finding Inspiration in Everyday Life
Inspiration is everywhere, not just in fancy art books. Look at the way light hits a building, the colors in a grocery store, or the patterns in a pile of laundry. Carry a small sketchbook and jot down ideas or do quick color studies. The more you observe, the more you’ll find things that spark your creativity. I find that even looking at different artist paint brushes can give me ideas.
Building a Consistent Practice Routine
The key to developing your style is consistent practice. Even if it’s just for 15 minutes a day, make time to paint. Don’t put too much pressure on yourself to create masterpieces every time. Some days will be great, and some days will be… not so great. But every time you paint, you’re learning and growing. Think of it like this:
| Day | Activity | Time (minutes) | Notes |
|---|---|---|---|
| Monday | Color Mixing | 15 | Focus on greens |
| Tuesday | Basic Washes | 20 | Try different paper angles |
| Wednesday | Landscape Painting | 30 | Use a reference photo |
| Thursday | Free Painting | 15 | Paint whatever comes to mind |
| Friday | Review Work | 10 | Identify areas for improvement |
Remember, your style is a journey, not a destination. It will evolve and change over time, and that’s perfectly okay. Embrace the process, have fun, and don’t be afraid to experiment. The most important thing is to paint what you love and to keep learning. You might even want to look at a watercolor set to get started.
Conclusion
So, there you have it. We’ve gone over some basic steps to get you started with watercolor. Remember, it’s not about being perfect right away. It’s about having fun and seeing what happens when you mix water and paint. Keep trying new things, even if they don’t turn out like you planned. Every brushstroke is a chance to learn something new. Just keep painting, and you’ll get better over time. Happy painting!
Frequently Asked Questions
How do I start watercolor painting if I’m a complete beginner?
Starting with watercolor painting is easier than you might think! The key is to begin with good quality, yet affordable, supplies. Look for a basic set of watercolor paints, a couple of different-sized brushes (one medium round, one flat), and some watercolor paper. There are many simple online tutorials and beginner books that can guide you through your first steps, focusing on basic techniques like washes and color mixing. Don’t be afraid to experiment and have fun!
What kind of paper should I use for watercolor painting?
The best paper for watercolors is usually thick, at least 140 lb (300 gsm), and made for watercolor. This kind of paper can handle a lot of water without wrinkling or buckling. You can choose between cold press (which has a bit of texture) or hot press (which is very smooth), depending on the kind of look you want for your painting. Both work well for beginners.
Which brushes are essential for a beginner watercolor artist?
When it comes to brushes, a good starting point is a medium-sized round brush, which is great for many tasks, and a flat brush, useful for broader strokes and washes. As you get more comfortable, you might want to add a smaller detail brush for fine lines. Natural hair brushes can hold more water, but synthetic brushes are often more affordable and easier to clean, making them a good choice for beginners.
How can I prevent my watercolor paintings from looking muddy?
To keep your colors from looking muddy, try to avoid overworking your paint or mixing too many colors together on your palette or paper. Let layers dry completely before adding new ones, and remember that watercolor is about transparency. If a color looks too strong, you can often lift some of it with a clean, damp brush or a paper towel.
What is the ‘wet-on-wet’ technique in watercolor?
The ‘wet-on-wet’ technique means applying wet paint onto a wet surface (either wet paper or wet paint that’s still damp). This makes the colors spread and blend softly, creating beautiful, flowing effects. It’s great for skies, backgrounds, or anything that needs a smooth, blended look. Just make sure your paper isn’t too wet, or the colors might become too diluted.
Can I fix mistakes in watercolor painting?
Absolutely! Mistakes are a natural part of learning. For watercolors, you can often lift or lighten areas by gently dabbing with a clean, damp brush or a paper towel. For more stubborn mistakes, a damp sponge or even a special ‘lifting’ brush can help. Sometimes, you can even turn a ‘mistake’ into a new part of your painting, so don’t be afraid to experiment and see what happens!


Leave a comment