

If you’re new to the world of painting and want to explore the vibrant medium of acrylics, you’re in the right place. This guide will break down the process of painting easy step by step, making it accessible for everyone. From setting up your workspace to mastering essential techniques, we’ll cover everything you need to know to get started on your artistic journey. So grab your brushes, and let’s dive into the colorful world of acrylic painting!
Key Takeaways
- Choose a well-lit and organized space for painting.
- Understand the different types of acrylic paints and how to mix colors.
- Select the right brushes and tools for your projects.
- Practice basic techniques like layering and blending for better results.
- Don’t be afraid to experiment and make mistakes; that’s part of the learning process!
Setting Up Your Painting Space
Okay, so you’re ready to start painting! Awesome. But before you squeeze out those vibrant colors, let’s talk about setting up your space. It’s more important than you think. Trust me, a little prep goes a long way in making the whole process smoother and way more enjoyable. I remember one time I tried painting on my coffee table…big mistake. Paint ended up everywhere, and I was cleaning for days. Learn from my mistakes!
Choosing the Right Location
First things first: where are you going to paint? Ideally, you want a spot that’s well-ventilated and easy to clean. Acrylics aren’t super toxic, but you still don’t want to be breathing in fumes all day. Plus, spills happen. A lot. So, think about surfaces that can handle a bit of mess. I personally love working in my garage because I don’t have to worry too much about splatters. But if you’re stuck inside, a spare room or even a corner of your living room can work. Just make sure you cover your furniture!
Lighting Considerations
Lighting is HUGE. You need to be able to see what you’re doing, right? Natural light is the best, hands down. If you can set up near a window, do it. But if natural light isn’t an option (or it’s nighttime), then you’ll need some good artificial light. I recommend getting a daylight lamp. These lamps mimic natural light and help you see the true colors of your paints. Regular lamps can cast a yellow tint, which can mess with your color mixing. I learned that the hard way when I tried to paint a portrait and ended up with a weirdly orange face. Not fun.
Organizing Your Supplies
Okay, this is where things can get a little overwhelming, especially when you’re just starting out. But trust me, having your supplies organized will save you a ton of time and frustration. Here’s what I do:
- Designated containers: I use old jars and plastic containers to hold my brushes, paints, and other tools. This keeps everything neat and tidy.
- Palette organization: I have a separate palette for each type of paint I use. This prevents colors from mixing and getting muddy. You can even use a palette knife to mix the colors.
- Easy access: Keep your most frequently used supplies within easy reach. This will prevent you from having to get up and search for things constantly.
I cannot stress enough the importance of a clean and organized workspace. It not only makes painting more enjoyable but also helps you focus on your art. A cluttered space equals a cluttered mind, and that’s the last thing you want when you’re trying to be creative.
Here’s a simple table to help you visualize your setup:
| Item | Purpose | Location |
|---|---|---|
| Easel | Holds your canvas | Well-lit area |
| Palette | Mixing paints | Within easy reach |
| Brushes | Applying paint | Organized container |
| Water container | Cleaning brushes | Next to your palette |
| Rags/Paper towels | Cleaning spills and brushes | Within easy reach |
So, there you have it! Setting up your painting space doesn’t have to be a chore. With a little planning and organization, you can create a space that’s both functional and inspiring. Now, go get painting!
Understanding Acrylic Paints
Acrylics are pretty cool because they’re so versatile. You can use them for almost anything, from detailed work to big, abstract pieces. They dry fast, which can be a blessing and a curse, but once you get the hang of it, you can really build up layers quickly. Let’s get into the nitty-gritty.
Types of Acrylic Paints
Okay, so there are a few different kinds of acrylics you should know about. Student-grade paints are cheaper and great for practicing. They don’t have as much pigment, so the colors might not be as vibrant, but they’re perfect when you’re just starting and experimenting. Artist-grade paints are where it’s at if you want really rich, intense colors that last. Then you’ve got things like acrylic inks, which are super fluid and great for washes and details, and acrylic gouache, which dries matte and is awesome for graphic designs. Each type has its own unique properties, so it’s worth trying them all out to see what you like best. Don’t forget to check out acrylic painting for more information.
Mixing Colors Effectively
Color mixing is where the magic happens! Start with a basic color wheel – knowing which colors are complementary (opposite each other) is super helpful. When you mix complementary colors, you get browns and grays, which are great for shadows and toning down bright colors. Always mix a little bit at a time; it’s easier to add more color than to take it away. Keep a color mixing log, noting the ratios you use to achieve certain colors. This will save you a ton of time and frustration later on. Also, remember that the color will look slightly different when it dries, so always do a test swatch.
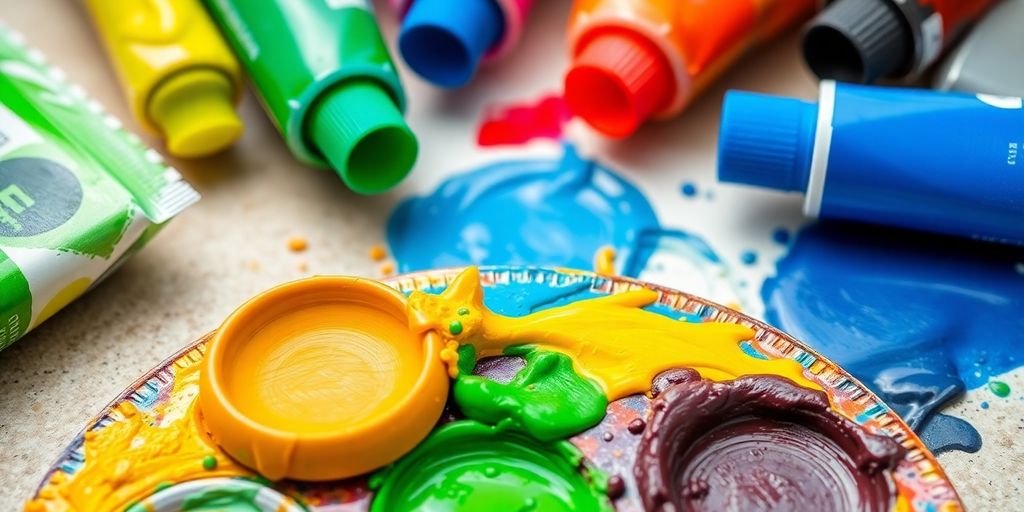
Choosing the Right Palette
Your palette is your workstation for mixing paints, and there are a bunch of options. Disposable palettes are great for easy cleanup – just toss them when you’re done. Wet palettes are awesome because they keep your paints from drying out too fast. They have a special paper that stays damp, so your paints stay workable for longer. You can also use a glass or ceramic palette, which is easy to clean but doesn’t have the moisture-retaining feature of a wet palette. Ultimately, it comes down to personal preference. Find what works best for you and your painting style.
I remember when I first started, I used a paper plate as a palette. It worked okay, but the paint dried so fast! Switching to a wet palette was a game-changer. It kept my paints usable for hours, and I didn’t have to constantly mix new colors. Definitely worth the investment.
Essential Tools for Beginners
Okay, so you’re ready to dive into acrylic painting? Awesome! Before you start slinging paint everywhere, let’s talk about the tools you’ll need. You don’t need to break the bank, but having the right stuff will make a huge difference. Trust me, I learned that the hard way when I started with some super cheap brushes that shed more than my dog.
Selecting Brushes for Acrylics
Brushes are your best friends in painting. Choosing the right ones can seriously impact your work. You’ll want a variety of shapes and sizes to handle different tasks. Here’s a quick rundown:
- Round Brushes: Great for detail work, thin lines, and outlining. Get a few different sizes.
- Flat Brushes: Ideal for blending, covering large areas, and creating bold strokes. A must-have.
- Filbert Brushes: A mix between round and flat, perfect for soft edges and blending. Super versatile.
- Angular Brushes: These are amazing for creating sharp edges and precise lines. Think leaves, architectural details, etc.
Synthetic brushes are generally recommended for acrylics because they hold up better to the paint and cleaning. Natural hair brushes can work, but they tend to get damaged more easily. Don’t go too cheap on your brushes, but you don’t need the most expensive ones either. A mid-range set is a good starting point. Also, make sure to clean your brushes thoroughly after each use to extend their lifespan. I use a brush cleaner and it works wonders.
Using Palette Knives
Palette knives aren’t just for mixing paint! They can also be used to apply paint to the canvas for some really cool effects. Using palette knives can add texture and dimension to your paintings that you just can’t achieve with a brush. Here’s the deal:
- Mixing Paint: This is the primary use. They help you blend colors without wasting paint.
- Applying Paint: Use them to create thick, textured strokes. Try different angles and pressures.
- Scraping Paint: Remove excess paint or create interesting effects by scraping across the canvas.
I remember the first time I tried using a palette knife to paint. I was trying to recreate a landscape I saw online, and it was a complete disaster. The paint was everywhere, the texture was all wrong, and it looked nothing like the original. But, I kept practicing, and eventually, I got the hang of it. Now, it’s one of my favorite tools to use.
Understanding Canvas Types
The canvas you choose can also affect the final look of your painting. There are a few different types to consider:
- Stretched Canvas: This is the most common type. It’s pre-stretched over a wooden frame and ready to paint on. They come in various sizes and thicknesses.
- Canvas Panels: These are thin, rigid boards covered in canvas. They’re less expensive than stretched canvases and great for practicing or smaller paintings.
- Canvas Pads: These are pads of canvas sheets, similar to a sketchbook. Good for experimenting and quick studies. They are great for acrylic painting ideas.
Consider the following table when choosing your canvas:
| Canvas Type | Pros | Cons |
|---|---|---|
| Stretched | Ready to use, various sizes | More expensive |
| Canvas Panels | Affordable, good for practice | Less durable than stretched canvases |
| Canvas Pads | Great for experimenting, portable | Not suitable for finished artwork |
Most canvases come pre-primed with gesso, which is a white coating that helps the paint adhere to the surface. If you’re using a raw canvas, you’ll need to apply a few coats of gesso yourself. It’s a bit of a pain, but it’s worth it for the best results.
Basic Acrylic Techniques to Master
Layering and Glazing
Layering and glazing are fundamental techniques in acrylic painting. Layering involves applying opaque colors on top of each other to build up depth and form, while glazing uses transparent washes to modify the colors underneath. Acrylics are great for this because they dry quickly, allowing you to add layers without waiting forever. I remember when I first started, I was so impatient and would try to layer before the paint was dry. Big mistake! It just turned into a muddy mess. Now, I make sure each layer is completely dry before moving on. It makes a huge difference.
Creating Texture
Adding texture can really bring your paintings to life. There are several ways to do this with acrylics:
- Impasto: Applying thick paint with a brush or palette knife.
- Dry Brushing: Using a dry brush with very little paint to create a scratchy effect.
- Adding Mediums: Gels and pastes can be mixed with acrylics to create different textures.
I love using a palette knife to create impasto effects. It gives the painting so much dimension. One time, I even mixed sand into my paint to create a really rough texture for a landscape painting. It was a fun experiment!
Blending Colors
Blending is key to creating smooth transitions between colors. Acrylics can be tricky because they dry fast, but here are a few tips:
- Wet-on-Wet: Blending colors while they are still wet on the canvas.
- Using a Blending Medium: This slows down the drying time, giving you more time to blend.
- Feathering: Using light, feathery strokes to blend the edges of colors.
Blending can be frustrating at first, but don’t give up! Practice makes perfect. Try blending two colors together on a small piece of canvas until you get the hang of it. Once you master blending, you can add highlights and shadows to your paintings to create depth and realism.
Here’s a simple table to illustrate blending techniques:
| Technique | Description | Drying Time | Difficulty | Best For |
|---|---|---|---|---|
| Wet-on-Wet | Blending colors while they are still wet. | Fast | Medium | Smooth transitions |
| Blending Medium | Using a medium to slow down drying time. | Slow | Easy | Detailed blending |
| Feathering | Using light, feathery strokes to blend edges. | Medium | Medium | Softening edges |
Developing Your Artistic Skills
Drawing Your Composition
Before you even think about squeezing paint onto your palette, take some time to plan your painting. Drawing your composition is a key step that many beginners skip, but it can save you a lot of frustration later on. Think of it as creating a roadmap for your painting. It doesn’t have to be a masterpiece in itself, but it should outline the basic shapes, placement, and proportions of the elements you want to include. This initial sketch helps you visualize the final piece and make adjustments before you commit to paint. I usually use a light pencil so I can easily erase any mistakes. It’s also a good idea to consider your canvas types.
Practicing with Simple Shapes
Don’t jump straight into complex scenes! Start with simple shapes to get a feel for how acrylics behave. Think about painting spheres, cubes, and cylinders. These basic forms are the building blocks of more complex objects. Focus on understanding light and shadow, and how to create the illusion of three-dimensionality. It’s also a great way to practice mixing colors effectively and blending techniques without the pressure of creating a finished piece. Here’s a simple exercise:
- Draw a circle on your canvas.
- Choose a light source.
- Apply a base color to the entire circle.
- Add shadows to the side opposite the light source.
- Blend the shadows into the base color to create a smooth transition.
- Add a highlight to the side closest to the light source.
Practicing with simple shapes is like learning scales on a musical instrument. It might not be the most exciting thing, but it builds a solid foundation for more advanced techniques.
Experimenting with Styles
Once you’re comfortable with the basics, it’s time to explore different styles. Don’t be afraid to try something new! Maybe you’re drawn to realism, or perhaps abstract art is more your thing. The beauty of acrylics is their versatility. You can use them to create a wide range of effects, from smooth, blended surfaces to textured, impasto finishes. Try out different acrylic painting techniques and see what resonates with you. Here are a few styles to consider:
- Realism: Focus on capturing details and creating a lifelike representation of your subject.
- Impressionism: Emphasize light and color, using loose brushstrokes to create a sense of movement and atmosphere.
- Abstract: Explore non-representational forms and colors, focusing on expressing emotions and ideas rather than depicting reality.
- Pop Art: Incorporate elements of popular culture, using bold colors and graphic designs.
Experimenting with different styles is a great way to discover your own unique artistic voice. Don’t worry about being perfect – just have fun and see where your creativity takes you!
Troubleshooting Common Issues
Fixing Mistakes
Okay, so you messed up. It happens! Don’t freak out. Acrylics are actually pretty forgiving. The key is to act fast. If the paint is still wet, you can usually wipe it away with a damp cloth or brush. For small errors, a cotton swab dipped in water works wonders. If the paint has dried, you have a couple of options. You can try sanding it down gently with fine-grit sandpaper, or you can paint over it. Just make sure the underlying layer is completely dry first. Sometimes, a happy accident can turn into something even better than you originally planned!
Dealing with Dull Colors
Ever finish a painting and think, "Ugh, this looks so blah"? Dull colors are a common problem, but easily fixed. First, make sure you’re using good quality paints. Cheap paints often lack pigment. Second, consider your color mixing. Muddy colors often result from over-mixing or using too many colors at once. Try limiting your palette to a few key colors and mixing them carefully. Finally, think about contrast. Adding highlights and shadows can really make your colors pop. A glaze of a brighter, more vibrant color can also do the trick. Don’t be afraid to experiment with color mixing to achieve the desired effect.
Preventing Paint from Drying
Acrylics dry fast, like, really fast. This can be a blessing and a curse. On one hand, you can layer quickly. On the other, your paints can dry on your palette before you even get a chance to use them. Here’s how to slow things down:
- Use a stay-wet palette. These palettes have a special paper that keeps your paints moist for longer.
- Mist your paints with water regularly. A spray bottle is your best friend.
- Add a retarder medium to your paints. This will slow down the drying time without affecting the paint’s consistency.
- Work in a cool, humid environment. Avoid painting in direct sunlight or near a heater.
I remember one time, I was painting outside on a super hot day, and my paints were drying faster than I could squeeze them out of the tube. It was a total disaster! Now, I always bring a spray bottle and a damp cloth with me, no matter where I’m painting.
Here’s a quick table summarizing drying time factors:
| Factor | Effect on Drying Time | Solution |
|---|---|---|
| Temperature | Higher = Faster | Work in a cooler environment |
| Humidity | Lower = Faster | Increase humidity (misting, humidifier) |
| Paint Thickness | Thicker = Slower | Apply thinner layers |
Finishing Touches for Your Artwork
Adding Highlights and Shadows
Okay, so you’ve got your painting looking pretty good, but it’s still missing that oomph, right? That’s where highlights and shadows come in. They’re not just about making things lighter or darker; they’re about creating depth and making your painting look more realistic (or stylized, if that’s your thing). Think about where the light source is in your painting. Is it coming from the left? The right? Directly above? That’ll dictate where your highlights and shadows go. For highlights, you can use a lighter shade of the color you’re already using, or even a touch of white. For shadows, go darker – maybe add a bit of black or a complementary color to deepen the shade. Don’t be afraid to experiment! It’s all about playing with light and dark to bring your painting to life. You can use lighter layers to create highlights, depth, and texture within any dark area.
Varnishing Your Painting
Once your painting is completely dry (and I mean completely – give it at least 24-48 hours), you might want to consider varnishing it. Varnishing does a few things: it protects your painting from dust, dirt, and UV light, and it can also even out the sheen of your painting. Some areas might be glossier than others, and varnish can help create a uniform finish. There are different types of varnishes available – gloss, matte, and satin – so choose the one that best suits your style and the look you’re going for. Gloss varnish will make your colors pop, while matte varnish will give a more subdued, non-reflective finish. Satin is a good middle ground. Apply the varnish in thin, even coats, and let it dry completely between coats. Usually, two coats are enough.
Framing Options
So, you’ve put in the time, effort, and creativity, and now you have a finished painting! What’s next? Framing, of course! Framing isn’t just about protecting your artwork; it’s also about enhancing it and making it look its best. Here are a few things to consider when choosing a frame:
- Style: Does your painting have a modern, minimalist vibe? Or is it more traditional and ornate? Choose a frame that complements the style of your artwork. A simple, clean frame can work well for modern pieces, while a more decorative frame might be better suited for traditional paintings.
- Color: The color of the frame can also have a big impact. A neutral-colored frame (like black, white, or wood) is usually a safe bet, as it won’t clash with the colors in your painting. But don’t be afraid to experiment with bolder colors if you want to make a statement.
- Size: The size of the frame is also important. You want a frame that’s proportional to the size of your painting. A frame that’s too small will make your painting look cramped, while a frame that’s too large will overwhelm it.
Framing can be expensive, but it’s worth it to protect and showcase your artwork. If you’re on a budget, consider looking for frames at thrift stores or online marketplaces. You can often find great deals on used frames that just need a little bit of TLC.
And there you have it! With these finishing touches, your acrylic painting will be ready to display and enjoy for years to come.
Wrapping It Up
So there you have it! You’ve got the basics of acrylic painting down, and now it’s time to get your hands dirty. Remember, practice is key. Don’t stress about making everything perfect right away. Just enjoy the process and let your creativity flow. Try out the techniques we talked about, and don’t be afraid to experiment. Each painting is a chance to learn something new. So grab your brushes, set up your space, and start creating. You might surprise yourself with what you can make!
Frequently Asked Questions
What do I need to start painting with acrylics?
To start painting with acrylics, you’ll need some basic supplies like acrylic paints, brushes, a palette for mixing colors, and a canvas or paper to paint on.
How do I mix colors with acrylic paint?
Mixing colors with acrylic paint is easy! Just use a palette and combine different colors to create new shades. Start with small amounts and adjust until you get the color you want.
What is the best way to set up my painting area?
Choose a spot with good lighting where you can work comfortably. Make sure to organize your supplies so everything is within reach while you paint.
How can I fix mistakes in my painting?
If you make a mistake, you can often fix it by painting over it with the right color. For small errors, a wet cloth can help wipe away paint before it dries.
Why do my colors look dull?
Colors may look dull if they are mixed too much or if you use too much water. Try using less water and layering colors to make them brighter.
How do I keep my paint from drying out while I work?
To keep your acrylic paint from drying out, you can mist it with water or cover your palette with a damp cloth when you’re not using it.


Leave a comment