
Are you tired of your old cabinets and thinking about giving them a fresh look? Painting cabinets can be a game changer for your kitchen or bathroom. It’s a cost-effective way to enhance your space without the hassle of a full remodel. But with so many options out there, picking the right paint for painting cabinets can feel daunting. This guide will help you sift through the choices, from paint types to prep work, ensuring you get a finish you’ll love for years to come.
Key Takeaways
- Choosing the right paint type is crucial for durability and finish.
- Prep work like cleaning and sanding can impact the final look of your cabinets.
- Consider moisture resistance, especially in kitchens and bathrooms.
- Test paint samples before committing to a color.
- Regular maintenance can extend the life of your painted cabinets.
Understanding Different Types Of Paint For Cabinets
Choosing the right paint for your cabinets is super important. It’s not just about color; it’s about how well the paint will hold up to daily use, spills, and the occasional slam of a cabinet door. Let’s break down the main types of paint you’ll encounter.
Water-Based Paints
Water-based paints, especially acrylic latex, have become increasingly popular for cabinets. They’re known for their low VOCs (volatile organic compounds), which means less of that strong paint smell and easier cleanup with just soap and water. One of the biggest advantages is their flexibility, which helps prevent cracking over time.
Here’s a quick rundown:
- Pros: Low VOCs, easy cleanup, flexible, good color retention.
- Cons: Can require more coats, may not be as durable as oil-based options in high-use areas, might need a really good primer.
- Best For: DIYers, those concerned about fumes, and projects where color fading is a concern.
Oil-Based Paints
Oil-based paints (also called alkyd paints) were once the go-to choice for cabinets because of their hard, durable finish. They provide excellent adhesion and a smooth, even look. However, they have higher VOCs, require mineral spirits for cleanup, and can yellow over time, especially in lighter colors. It’s also worth noting that home painting costs can be affected by the type of paint you choose, with oil-based paints often being more expensive due to their durability and application requirements.
Consider these points:
- Pros: Extremely durable, smooth finish, excellent adhesion.
- Cons: High VOCs, difficult cleanup, can yellow over time, longer drying times.
- Best For: High-traffic kitchens, achieving a super smooth finish, experienced painters.
Chalk Paints
Chalk paint is all the rage for a reason. It gives cabinets a matte finish and a vintage, distressed look. It adheres to surfaces really well, often without needing a ton of prep work. But, it needs a protective topcoat of wax or sealant, which adds another step to the process. Chalk paint is great if you want a specific aesthetic, but it might not be the most durable option for a busy kitchen.
Here’s the lowdown:
- Pros: Excellent adhesion, matte finish, vintage look, minimal prep work.
- Cons: Requires a topcoat, not as durable as other options, limited color selection.
- Best For: Achieving a distressed or vintage look, furniture projects, low-traffic areas.
Choosing between these paints really depends on your priorities. If you want something durable and are okay with the fumes, oil-based might be your pick. If you prefer easy cleanup and lower VOCs, water-based is a solid choice. And if you’re after a unique look and don’t mind some extra maintenance, chalk paint could be perfect.
Key Features To Look For In Cabinet Paint

When you’re picking out paint for your cabinets, it’s not just about the color. You need to think about how the paint will hold up over time. Cabinets get a lot of use, so the paint needs to be tough. Let’s break down the key things to consider.
Durability and Longevity
Durability is super important for cabinet paint. You want something that can handle daily wear and tear without chipping or scratching easily. Paints labeled "Cabinet," "Trim," or "Enamel" are usually formulated to be harder and more resistant. Hybrid alkyds are often a good choice here. Think about it – you don’t want to repaint every year!
- Look for paints specifically designed for cabinets.
- Consider paints with a urethane component for added toughness.
- Read reviews to see how well the paint holds up over time.
Moisture Resistance
Kitchens and bathrooms can get pretty humid, so your cabinet paint needs to be able to handle moisture. Paint that isn’t moisture-resistant can peel or blister over time. Nobody wants that! Make sure the paint you choose is designed to withstand humidity and occasional splashes.
Moisture resistance is key, especially in kitchens and bathrooms. Look for paints that are specifically formulated to handle humidity and prevent water damage. This will help your cabinets look great for years to come.
Ease of Application
Let’s be real, painting cabinets can be a pain. The easier the paint is to apply, the better. Some paints level out nicely with a brush or roller, while others are better suited for spraying. Foam rollers often give the smoothest finish without spraying. Consider your skill level and the tools you have available when choosing a paint. Also, pay attention to drying times – nobody wants to wait forever for the paint to dry!
Here’s a quick comparison of application methods:
| Method | Pros | Cons |
|---|---|---|
| Brush/Roller | Easy for beginners, minimal equipment | Can leave brush marks, slower |
| HVLP Sprayer | Professional finish, fast application | Requires experience, more equipment needed |
When thinking about bedroom paint pricing, remember that the cost of paint is only one factor. The durability, moisture resistance, and ease of application all contribute to the overall value and longevity of your painted cabinets.
Top Recommendations For Paint Brands In 2025
Best Overall Cabinet Paint
Okay, so you’re ready to dive into painting those cabinets, huh? Let’s talk brands. For the absolute best, the one that consistently gets rave reviews, it’s gotta be Benjamin Moore ADVANCE. Seriously, this stuff is like magic in a can. It levels out beautifully, meaning fewer brush strokes, and the finish is tough as nails. It’s a waterborne alkyd, so cleanup is easy with water, but it acts more like an oil-based paint in terms of durability. The downside? It takes a little longer to fully cure, so patience is key. But trust me, it’s worth the wait. You’ll get a professional-looking finish that will last for years. If you want to achieve a professional finish, this is the paint to get.
Budget-Friendly Options
Don’t want to break the bank? I get it. Painting cabinets can get expensive fast. Luckily, there are some great budget-friendly options out there that don’t sacrifice too much in terms of quality. Behr Premium Cabinet & Trim Enamel, available at Home Depot, is a solid choice. It provides good coverage, a hard, durable finish, and it’s easy to work with. It’s a water-based alkyd/urethane blend, so it cleans up easily too. It might not be quite as smooth as Benjamin Moore ADVANCE, but for the price, it’s hard to beat. Here’s a quick comparison:
| Feature | Benjamin Moore ADVANCE | Behr Premium Cabinet & Trim |
|---|---|---|
| Price | Higher | Lower |
| Finish | Exceptionally Smooth | Very Good |
| Durability | Excellent | Good |
| Ease of Use | Easy | Easy |
| Cure Time | Longer | Shorter |
Premium Choices
Alright, if money is no object and you want the absolute best of the best, let’s talk premium options. Inspired By U – Milesi is a top-tier choice that professionals swear by. This stuff is the real deal. It’s known for its exceptional durability and flawless finish. It’s a bit more challenging to work with than some of the other options, and it’s definitely an investment, but if you want cabinets that look like they came straight out of a magazine, this is the way to go. It’s a professional-grade product, so you might need to do some research to find a local supplier, but the results are worth it. Consider these points when choosing a premium paint:
- Durability: How well does it stand up to scratches, chips, and stains?
- Finish Quality: Is it smooth and even, or does it have imperfections?
- Application: Is it easy to apply, or does it require special skills or equipment?
Choosing the right paint is only half the battle. Proper preparation and application are just as important. Make sure to clean, sand, and prime your cabinets before you even think about opening that can of paint. And don’t rush the process! Take your time, apply thin coats, and let everything dry properly. You’ll be amazed at the difference it makes.
Preparing Cabinets For Painting
Painting your cabinets can totally transform your kitchen or bathroom, but skipping the prep work is a recipe for disaster. Trust me, I’ve learned this the hard way! You might think you can just slap some paint on and call it a day, but believe me, taking the time to prep properly will make a HUGE difference in how your cabinets look and how long the paint lasts. Let’s get into the nitty-gritty.
Cleaning and Sanding
First things first: cleaning. You need to remove all the grease, grime, and dust that’s accumulated on your cabinets over time. I usually use a degreasing cleaner and a scrub brush for this. Don’t skimp on this step! Once they’re clean, it’s time to sand. Sanding creates a slightly rough surface that the primer and paint can grip onto. You don’t need to go crazy and remove all the old finish, just scuff it up a bit. I like to use a medium-grit sandpaper for this, followed by a fine-grit to smooth things out. Remember to wipe away all the sanding dust with a tack cloth before moving on.
Priming Techniques
Priming is another step you don’t want to skip. Primer helps the paint adhere better, blocks stains, and creates a uniform surface for the paint. I usually use a bonding primer, especially if I’m painting over a glossy surface. Apply a thin, even coat of primer and let it dry completely before painting. For oak cabinets, which have a very open grain, you might want to consider using a filler to fill in the grain for a super smooth finish. This can save you extra steps if you are trying to get a smooth finish with just paint and sanding. You can find products for filling oak wood grain at most hardware stores.
Choosing the Right Tools
Using the right tools can make a huge difference in the final result. For cabinets, I recommend using a combination of brushes and rollers. Use a brush for the trim and detailed areas, and a roller for the flat surfaces. I prefer using high-quality synthetic brushes and foam rollers for a smooth, even finish. Also, don’t forget to have plenty of painter’s tape on hand to protect the surrounding areas. Here’s a quick list of essentials:
- Degreaser
- Sandpaper (medium and fine grit)
- Tack cloth
- Bonding primer
- High-quality brushes
- Foam rollers
- Painter’s tape
Proper preparation is key to a professional-looking cabinet painting job. Taking the time to clean, sand, and prime your cabinets will ensure that the paint adheres properly and lasts for years to come. Don’t cut corners on this step, or you’ll regret it later!
Achieving A Professional Finish
So, you’ve prepped your cabinets, picked out the perfect paint, and now it’s time to actually make them look amazing. This is where the rubber meets the road, folks. Getting that smooth, professional finish isn’t just about slapping on some paint; it’s about technique, patience, and a little bit of know-how. Let’s dive in.
Best Application Techniques
Okay, let’s talk application. You’ve got a few options here, and each has its pros and cons. Brushing is classic, rolling is efficient, and spraying is, well, the gold standard. If you’re aiming for that factory-fresh look, spraying is the way to go, but it requires some investment in equipment and practice. For most of us, a combination of brushing and rolling will do the trick. The key is to apply thin, even coats.
- Brushing: Use a high-quality brush, and don’t overload it with paint. Apply with long, even strokes, following the grain of the wood.
- Rolling: Use a foam roller for the smoothest finish. Again, thin coats are key. Overlap each pass slightly to avoid streaks.
- Spraying: If you’re using a sprayer, make sure to thin your paint according to the manufacturer’s instructions. Practice on a piece of cardboard before you tackle your cabinets. Keep the sprayer moving at a consistent speed and distance from the surface. For more information, check out this guide on flawless finishes with spray paint.
Tips For Smooth Finishes
Alright, let’s get into the nitty-gritty of achieving that super smooth finish we all crave. It’s all about the details, people. Sanding between coats is your best friend. Seriously, don’t skip this step. It makes a world of difference. Also, consider the paint’s finish; the best paint finishes impact both appearance and grip.
- Sand between coats: Use a fine-grit sandpaper (220 or higher) to lightly sand after each coat of paint has dried completely. This will knock down any imperfections and create a smooth surface for the next coat.
- Use a tack cloth: After sanding, wipe down the surface with a tack cloth to remove any dust. Even the tiniest speck of dust can ruin your finish.
- Consider a paint conditioner: Paint conditioners can help to improve the flow and leveling of your paint, resulting in a smoother finish. Follow the manufacturer’s instructions carefully.
Achieving a professional finish on your cabinets is a marathon, not a sprint. Take your time, pay attention to the details, and don’t be afraid to experiment. With a little practice, you’ll be amazed at what you can achieve.
Common Mistakes To Avoid
We all make mistakes, it’s part of being human. But when it comes to painting cabinets, some mistakes are more common (and more easily avoidable) than others. Let’s take a look at some of the big ones:
- Skipping prep work: I know, I know, it’s boring. But trust me, proper prep is essential for a long-lasting, professional finish. Don’t skip the cleaning, sanding, and priming steps.
- Applying thick coats of paint: Thick coats of paint are more likely to drip, sag, and take longer to dry. Thin coats are the way to go.
- Not sanding between coats: As I mentioned earlier, sanding between coats is crucial for a smooth finish. Don’t skip it!
Here’s a quick table summarizing common issues and solutions:
| Mistake | Solution |
|---|---|
| Drips and sags | Apply thinner coats; sand down drips and re-paint. |
| Brush marks | Use a foam roller; add a paint conditioner. |
| Uneven color | Apply multiple coats; use a high-quality primer. |
| Paint peeling | Ensure proper surface preparation; use a bonding primer. |
| Bubbles in the finish | Avoid shaking the paint too vigorously; use a quality brush. |
Avoid these common mistakes, and you’ll be well on your way to achieving a cabinet finish that would make a professional proud. Good luck!
Color Selection For Cabinet Painting
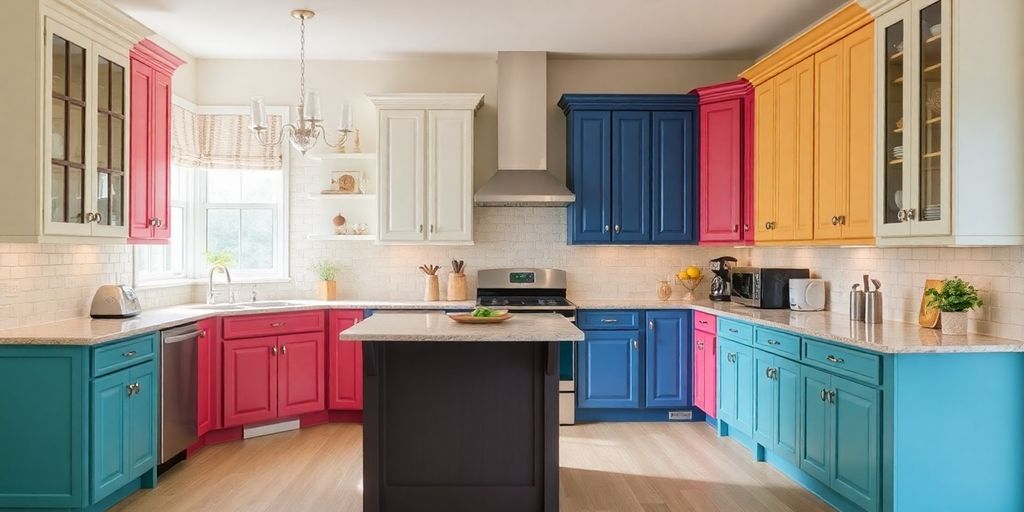
Trending Colors For 2025
Okay, so picking colors for your cabinets can feel like a big deal. What’s hot right now? Well, in 2025, we’re seeing a lot of people go for bolder choices. Think beyond just plain white. Darker, moodier colors are definitely having a moment.
- Deep charcoal grays are in.
- Near-blacks are making a statement.
- Moody browns can add a ton of depth.
These colors work great for kitchen islands or even just the lower cabinets if you don’t want to go too dark. On the other hand, classic neutrals are always a safe bet. You can’t really go wrong with a timeless neutral color.
Choosing Colors That Match Your Style
Your cabinets should reflect you, right? So, think about the overall vibe you’re going for in your kitchen or bathroom. Are you into a modern, sleek look? Or something more cozy and traditional? If you like things bright and airy, stick with lighter colors like off-whites or light grays. If you’re feeling adventurous, consider a pop of color. Maybe a bold blue or a rich green. Don’t be afraid to experiment! Here’s a quick guide:
| Style | Color Palette |
|---|---|
| Modern | Grays, blacks, whites, metallic accents |
| Traditional | Creams, beiges, warm woods, soft greens |
| Farmhouse | Whites, light blues, natural wood tones |
| Eclectic | Mix of bold colors, patterns, and textures |
Testing Paint Samples
Seriously, don’t skip this step! What looks good on a tiny paint chip can look totally different on your cabinets. Lighting makes a huge difference. Colors can shift depending on whether you have natural light, warm light bulbs, or cool light bulbs. Paint a few cabinet paint colors on a piece of cardboard or an inconspicuous spot on your cabinets and see how they look at different times of the day. Trust me, it’s worth the extra effort to avoid a color disaster.
Maintenance Tips For Painted Cabinets
Cleaning and Care
Keeping your newly painted cabinets looking great isn’t hard, but it does take some effort. The most important thing is to clean up spills right away. Don’t let liquids sit on the surface, especially around the sink or stove. Use a soft, damp cloth to wipe away messes. Avoid abrasive cleaners or scrub brushes, as these can scratch or dull the finish. For tougher spots, a mild dish soap diluted in water usually does the trick. After cleaning, always dry the cabinets with a clean, soft cloth.
Here’s a quick guide:
- Wipe spills immediately.
- Use a soft, damp cloth for cleaning.
- Avoid harsh chemicals and abrasive cleaners.
- Dry cabinets after cleaning.
I’ve found that a simple routine of wiping down my cabinets once a week keeps them looking fresh. It only takes a few minutes, and it prevents grime from building up. Plus, it’s a good way to spot any potential problems early on.
Touch-Up Techniques
Even with the best care, painted cabinets can get small chips or scratches over time. Don’t panic! Touching them up is usually pretty easy. First, clean the damaged area with a damp cloth. Then, lightly sand the spot to smooth out any rough edges. Apply a small amount of the original paint using a fine-tipped brush. Let it dry completely, and then lightly sand again if needed to blend the touch-up with the surrounding area. For deeper scratches, you might need to apply a primer before the paint. Make sure you keep some of the original paint on hand for these touch-ups!
When To Repaint
Eventually, even well-maintained cabinets will need a fresh coat of paint. How do you know when it’s time? Look for these signs:
- Extensive chipping or peeling paint.
- Fading or discoloration.
- A finish that’s become dull or difficult to clean.
- Major damage, like water stains or warping.
If your cabinets are showing several of these signs, it’s probably time to start planning a repaint. While it’s a bigger project than a simple touch-up, a fresh coat of paint can completely transform your kitchen and give it a whole new look. Consider exploring the best paint for kitchen cabinets when you decide to repaint.
Wrapping It Up
So, there you have it! Picking the right paint for your cabinets doesn’t have to be a headache. With all the options out there, just remember to think about what you need—durability, finish, and ease of use. Whether you’re going for a classic white or something bold, the right paint can really change the game. Don’t rush it, take your time to choose wisely, and you’ll end up with cabinets that look amazing and last for years. Happy painting!
Frequently Asked Questions
What type of paint is best for kitchen cabinets?
The best type of paint for kitchen cabinets is usually water-based paint because it dries quickly and has low fumes.
How do I prepare my cabinets for painting?
To prepare your cabinets, clean them well, sand the surfaces, and apply a primer if needed.
Can I use chalk paint on kitchen cabinets?
Yes, you can use chalk paint on kitchen cabinets, but it may need a protective topcoat for durability.
How long does cabinet paint take to dry?
Cabinet paint typically takes about 1 to 2 hours to dry to the touch, but you should wait at least 24 hours before using the cabinets.
What colors are trending for cabinets in 2025?
In 2025, popular cabinet colors include soft greens, deep blues, and classic whites.
How do I maintain my painted cabinets?
To maintain painted cabinets, clean them with a mild soap and water solution and do touch-ups as needed.


Leave a comment