
Painting your home doesn’t have to be a budget-buster. Whether you’re sprucing up a rental or giving your own place a fresh look, finding the cheapest paint for walls that still does the job well is totally doable. In this guide, we’re diving into the world of budget-friendly paints, exploring different brands, finishes, and tips to help you save some cash while still getting great results. Let’s get started!
Key Takeaways
- Understand the different paint types and finishes to choose the best one for your needs.
- Look into budget-friendly paint brands like Behr, Glidden, and Sherwin-Williams for affordable options.
- Take advantage of sales and store brands to cut down on paint costs.
- Proper wall preparation is essential for a smooth finish, even with cheap paint.
- Consider using paint-and-primer-in-one products to save time and money.
Understanding Paint Types and Finishes
When it comes to painting your home, understanding the different types of paint finishes is as important as choosing the right color. The finish you select can affect the room’s look and feel, as well as the durability and maintenance of the walls.
Exploring Different Paint Finishes
Paint finishes range from flat to high-gloss, each offering unique benefits. Flat or matte finishes are great for hiding imperfections, making them ideal for ceilings or low-traffic areas. However, they can be difficult to clean, so keep that in mind. Eggshell finishes add a touch more sheen, providing a balance between hiding flaws and being easier to wipe down. Satin finishes are popular for their smooth, velvety appearance and increased durability, perfect for living rooms and hallways. Semi-gloss and high-gloss finishes offer the most shine and are highly durable, making them suitable for kitchens and bathrooms where moisture resistance is key.
Choosing the Right Finish for Your Room
Selecting the right finish depends largely on the room’s function and the look you want to achieve. For rooms like kitchens and bathrooms, where surfaces are exposed to moisture and need frequent cleaning, a semi-gloss or gloss finish is recommended. In contrast, for a cozy living room or bedroom, a satin or eggshell finish might be more appropriate, offering a softer look while still being practical.
Comparing Matte, Satin, and Gloss Finishes
Here’s a quick comparison to help you decide:
| Finish Type | Shine Level | Durability | Best For |
|---|---|---|---|
| Matte | Low | Low | Ceilings, low-traffic areas |
| Satin | Medium | Medium | Living rooms, hallways |
| Gloss | High | High | Kitchens, bathrooms |
Choosing the right paint finish is like finding the perfect pair of shoes—it needs to fit the function and style of the room. Consider what each space is used for, and how much wear and tear it will endure, to make the best decision for your home.
Top Budget-Friendly Paint Brands
Review of Behr’s Affordable Options
Behr is a popular choice among budget-conscious homeowners. While it’s not the cheapest on the market, it offers a great balance between quality and price. Behr’s Marquee line, although a bit pricier, provides one-coat coverage which can save you time and money in the long run. If you’re planning a big project, this might be a cost-effective option.
Exploring Glidden’s Budget Paints
Glidden is known for its affordability and reliability. Their Premium Interior Paint + Primer is a standout for those on a budget. It dries quickly and has a smooth finish, making it ideal for low-traffic areas. While it may not be as stain-resistant as some higher-end options, it’s perfect for those looking to spruce up their space without spending a fortune.
Sherwin-Williams’ Cost-Effective Lines
Sherwin-Williams might be known for its higher-end paints, but they also offer budget-friendly lines that don’t skimp on quality. Their Captivate line is a great choice for those who want a durable paint without breaking the bank. It’s especially popular for rental properties and frequent repaints due to its reasonable price and decent coverage.
Choosing the right paint doesn’t have to be expensive. By exploring different brands and lines, you can find a paint that fits both your needs and your budget. Consider factors like coverage, finish, and drying time to make the best decision for your home.
For more cost-effective painting options for homes and offices, consider expert advice to save money while improving your environment.
Tips for Buying the Cheapest Paint for Walls
How to Find Sales and Discounts
Finding paint on a budget often means keeping an eye out for sales and discounts. Watch for promotions in Sunday papers or online ads, as there’s almost always a deal to be found. Hardware stores frequently offer discounts on their store brands, which can be a great way to save. Don’t overlook mistinted or returned paint cans at big-box stores, which are often sold at a fraction of the cost.
Understanding Paint Coverage and Costs
When you’re buying paint, it’s crucial to understand how much you’ll need. A standard gallon of paint typically covers about 350 to 400 square feet. To get the best value, calculate the total square footage of the area you plan to paint. Consider buying larger containers, like 5-gallon buckets, for bigger projects to reduce cost per gallon.
Choosing Store Brands for Savings
Store brands can be a smart choice for budget-conscious buyers. Many stores, like Ace Hardware and True Value, offer their own lines of paint that are both affordable and decent in quality. While they might not have the prestige of bigger names, they often perform well enough for most interior projects.
When it comes to painting on a budget, the key is balancing cost with quality. You don’t have to spend a fortune to get a decent finish, but cutting too many corners might lead to more work in the long run. Always weigh the price against the potential need for additional coats or touch-ups.
Preparing Your Walls for Painting
Importance of Surface Preparation
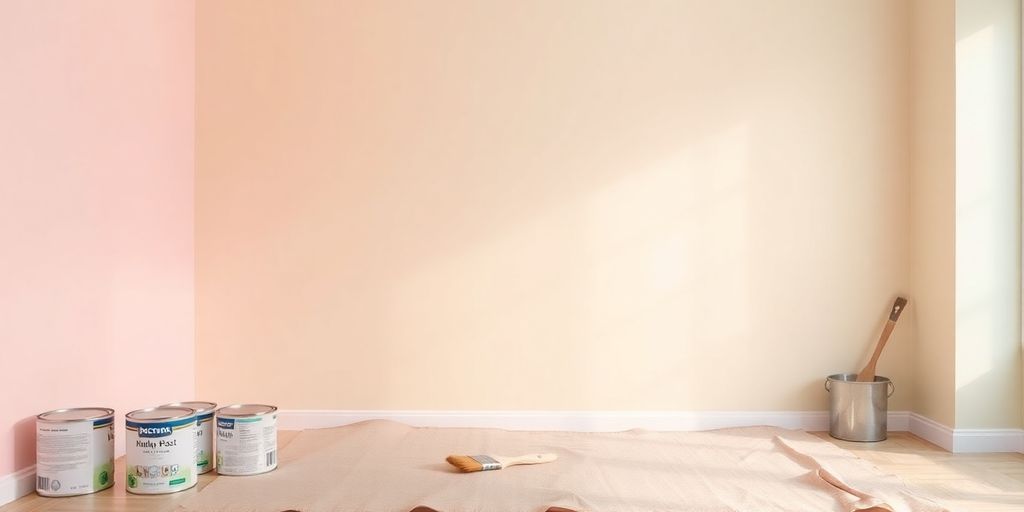
Before diving into painting, it’s crucial to prep your walls. A well-prepared surface can make a huge difference in the final look of your paint job. Start by cleaning the walls thoroughly. Remove any dust, dirt, or grease with a mild soap solution. If there are any cracks or holes, fill them with spackle or putty and sand them smooth once dry. This step ensures the paint adheres properly and lasts longer.
Tools Needed for Wall Preparation
Having the right tools makes prepping your walls much easier. Here’s a list of essentials:
- Scraper or putty knife: For removing old, flaking paint.
- Sandpaper or sanding block: To smooth out surfaces and edges.
- Spackle or putty: For filling holes and cracks.
- Microfiber cloth or tack cloth: To remove dust before painting.
- Painter’s tape: To protect trim and moldings.
Common Mistakes to Avoid
When preparing to paint, there are a few common pitfalls to watch out for:
- Skipping the cleaning step: Painting over dirt or grease can cause peeling later on.
- Not using primer: A primer can help the paint adhere better and even out the surface.
- Ignoring small repairs: Even tiny holes or cracks can ruin the finish if not addressed.
Proper preparation not only enhances the look of your paint job but also increases its durability. Take the time to do it right, and you’ll be rewarded with a beautiful, long-lasting finish.
Maximizing Paint Efficiency
Calculating the Right Amount of Paint
Getting the right amount of paint is crucial. You don’t want to run out in the middle of a job, but you also don’t want to overbuy. Start by measuring the total square footage of the areas you plan to cover. Remember, a gallon of paint typically covers about 350 to 400 square feet. Most paint brands offer online calculators to help with this math.
Consider purchasing larger containers for big projects. Buying in bulk, like 5-gallon buckets, can save you money in the long run. If you’re unsure about the amount, start with less—you can always buy more if needed.
Techniques for Even Application
Even application is key to a professional-looking paint job. Invest in good quality brushes and rollers; they make a huge difference. Cheap tools might save you money upfront, but they can lead to uneven coats and more work in the long run.
- Use a roller for large, flat surfaces and a brush for corners and edges.
- Apply paint in a "W" or "M" pattern to avoid streaks and ensure even coverage.
- Don’t overload your brush or roller; excess paint can lead to drips and uneven texture.
Using Paint and Primer in One
Paint-and-primer combos are a great way to save time and effort. These products combine two steps into one, reducing the need for multiple coats and cutting down on labor. However, they work best on walls that are in good condition. If you’re dealing with a surface that has stains or is a darker color, you might still need a separate primer.
A well-prepared surface is half the battle won. Ensure your walls are clean and smooth before you start painting. Fill in any holes or cracks, sand down rough spots, and make sure everything is dust-free.
When you’re planning your remodeling project, consider the timing of your painting. It’s often best to paint after major construction and flooring are completed to avoid damage to freshly painted walls.
Comparing Paint Quality and Price
Balancing Cost and Durability
When it comes to painting your walls, finding the right balance between cost and durability can be tricky. Cheaper paints might seem like a good deal upfront, but they often require more coats to achieve the desired look. This means you could end up spending more in the long run, not to mention the extra time and effort involved. On the other hand, investing in slightly pricier options, like 100 percent acrylic paints, can offer superior durability and ease of cleaning. These paints cure harder and are less porous, making them a worthwhile investment for a long-lasting finish.
Evaluating Paint Performance
When you’re evaluating paint performance, consider factors such as coverage, finish, and ease of application. Some budget paints, like those from True Value, are noted for their excellent value, offering good coverage and durability without breaking the bank. Meanwhile, others like Glidden’s lower-end options might not perform as well, often requiring additional coats. A quick tip is to look for paints with a reputation for single-coat coverage, as these can save both time and money in the long run.
Understanding VOC Levels in Paint
Volatile Organic Compounds (VOCs) in paint can affect indoor air quality and overall health. Lower-cost paints might have higher VOC levels, which can be harmful over time. When comparing prices, it’s essential to consider the VOC content as well. Opting for low-VOC or zero-VOC paints can be a healthier choice, even if they come with a slightly higher price tag. Always check the labels and product specifications to ensure you’re making an informed decision.
Choosing the right paint isn’t just about the initial price. It’s about finding a product that offers the right combination of cost, quality, and safety for your home. A little research and consideration can go a long way in ensuring a successful painting project.
DIY Painting Tips for Beginners
Essential Tools for Painting
Starting your painting project? Make sure your toolkit is ready. You’ll need a variety of brushes, rollers, and painter’s tape for clean edges. Don’t forget a drop cloth to protect your floors and furniture. It’s also wise to have a paint tray and stir sticks. Quality tools can make a huge difference in your painting experience, helping you achieve a smooth finish without frustration.
Step-by-Step Painting Guide
- Prep Your Space: Begin by moving furniture and covering floors with drop cloths.
- Clean the Walls: Dust and wash the surfaces to remove dirt and grime.
- Tape Off Areas: Use painter’s tape to protect trim, ceilings, and other areas you don’t want painted.
- Prime the Walls: If necessary, apply a primer to ensure even paint coverage.
- Start Painting: Use a brush for edges and corners, then a roller for larger areas. Apply in thin, even coats.
- Let It Dry: Allow each coat to dry completely before applying the next.
Troubleshooting Common Painting Issues
Even with the best preparation, issues can arise. Here’s how to handle them:
- Streaks or Uneven Finish: This often happens when the paint is applied too thickly or unevenly. Thin it out and use even strokes.
- Paint Drips: These occur when there’s too much paint on the brush or roller. Wipe off excess paint before applying.
- Bubbles or Blisters: Usually caused by painting over a damp surface. Ensure the wall is completely dry before painting.
Painting can seem daunting, especially when you’re just starting out. But with the right tools, preparation, and a little patience, you’ll find that it’s a rewarding project that can transform your space.
For those just starting out, consider beginning your painting journey with student-quality paints, ensuring you have all primary colors, black, and white. This foundational palette will help you explore various techniques and create vibrant artworks.
Wrapping It Up: Finding the Right Paint for Your Budget
So, there you have it! Finding the right paint for your walls doesn’t have to drain your wallet. Whether you’re sprucing up a rental or just want a fresh look without the hefty price tag, there are plenty of options out there. From store brands to big names like Behr and Glidden, you can find something that fits your needs and budget. Just remember, a little prep work goes a long way in making your paint job look its best. So grab your brushes, maybe a friend or two, and get painting. Your walls—and your bank account—will thank you!
Frequently Asked Questions
What is the most affordable interior paint?
Many people find that Behr and Glidden offer budget-friendly options for interior paint. These brands provide good coverage without breaking the bank.
How can I save money when buying paint?
Look for sales and discounts at local hardware stores. Buying paint in larger quantities, like 5-gallon buckets, can also lower costs.
How much paint do I need for a 360 sq ft room?
Typically, one gallon of paint covers about 350 to 400 square feet. For a 360 sq ft room, you might need one or two gallons, depending on the number of coats.
What tools do I need for painting walls?
You’ll need brushes, rollers, painter’s tape, drop cloths, and a paint tray. Quality tools can make the job easier and the results better.
Why is surface prep important before painting?
Preparing the surface ensures the paint adheres properly and lasts longer. This includes cleaning, sanding, and priming if necessary.
Is it better to use paint and primer in one?
Paint and primer in one can save time and effort, especially for small projects or when repainting a similar color. However, separate primer might be needed for new surfaces.


Leave a comment